A Floral Spring Oasis
I’m so excited to share this floral spring oasis DIY with you! I was a little nervous about this one, simply because I wan’t sure how this beauty would hold up, or even survive more than a day! Good news, this gorgeous spring oasis will be around for at least three to five days. (Mine made it to day four!) I’m going to take you thought this DIY step by step, photo by photo to help you create your own!


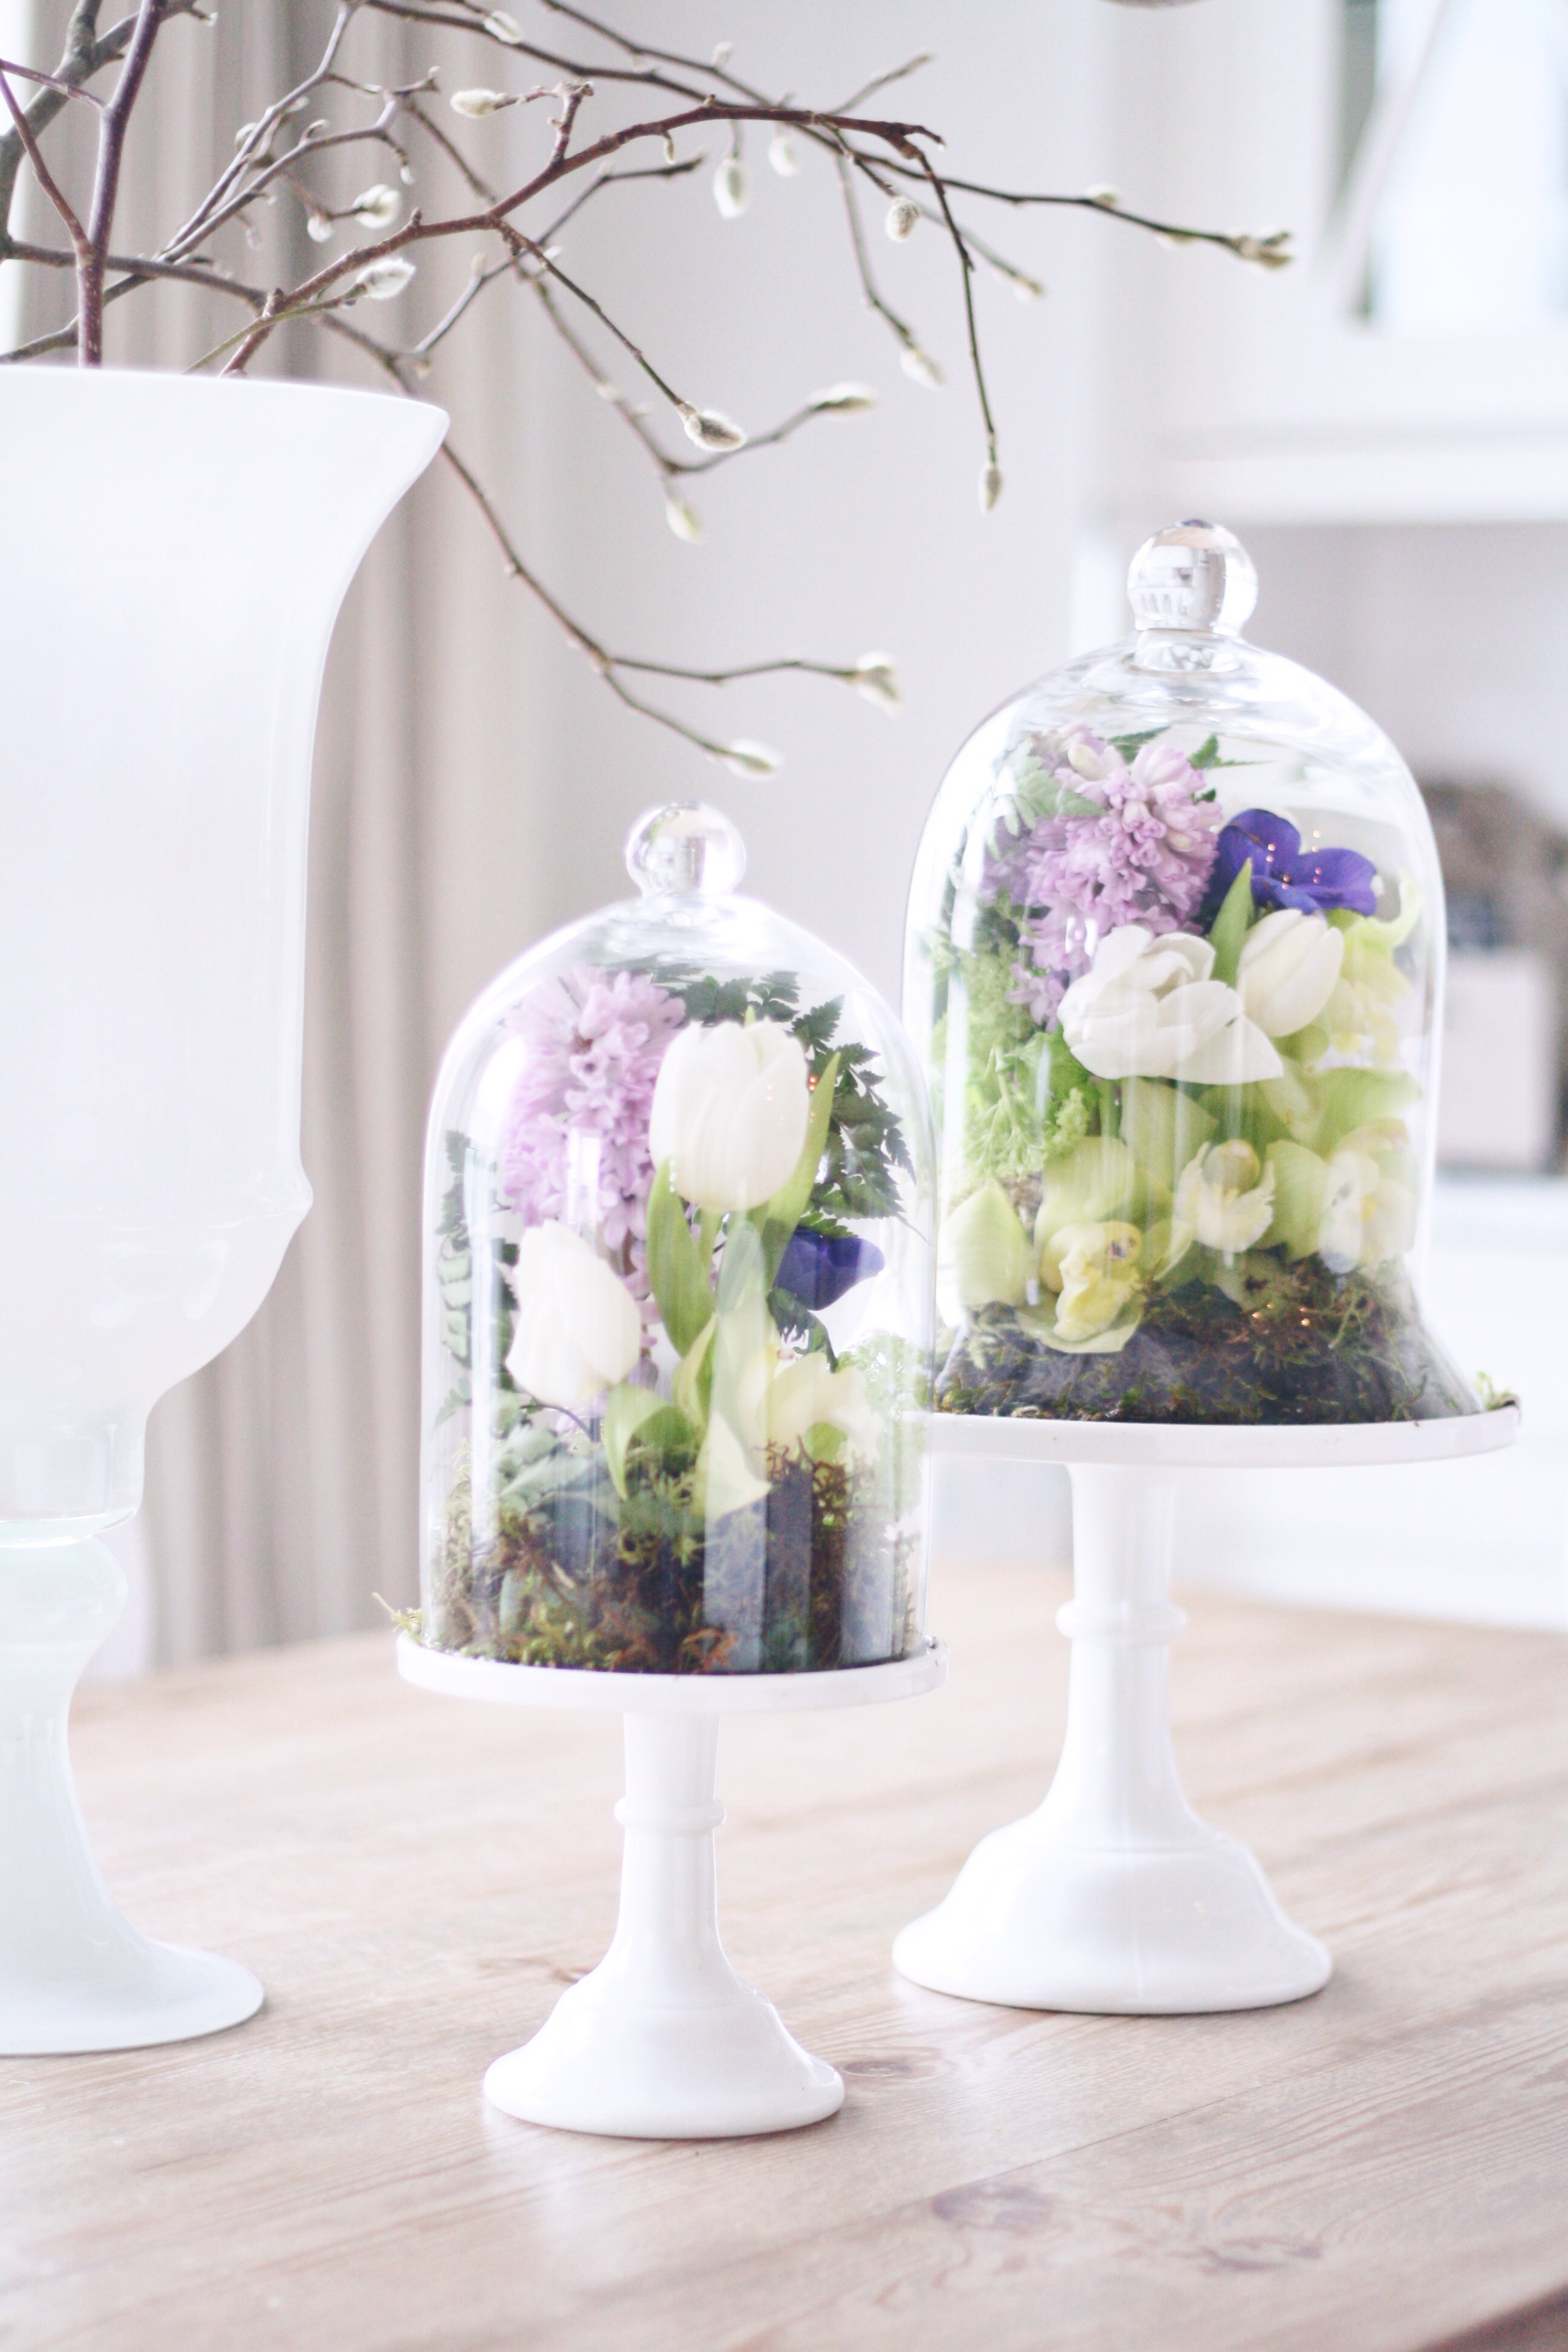
You’ll need: Fresh flowers, cake stand, cloche (the glass dome), floral foam brick (one that absorbs water) and fresh moss.
My milk glass cake stands and cloches are from The Cross Design. Flowers from Lusso Verde.

Cut your flowers to a desired height. Remember no taller then the cloche. Flowers I used: orchids, tulips, hyacinths, anemones and few fern leaves.
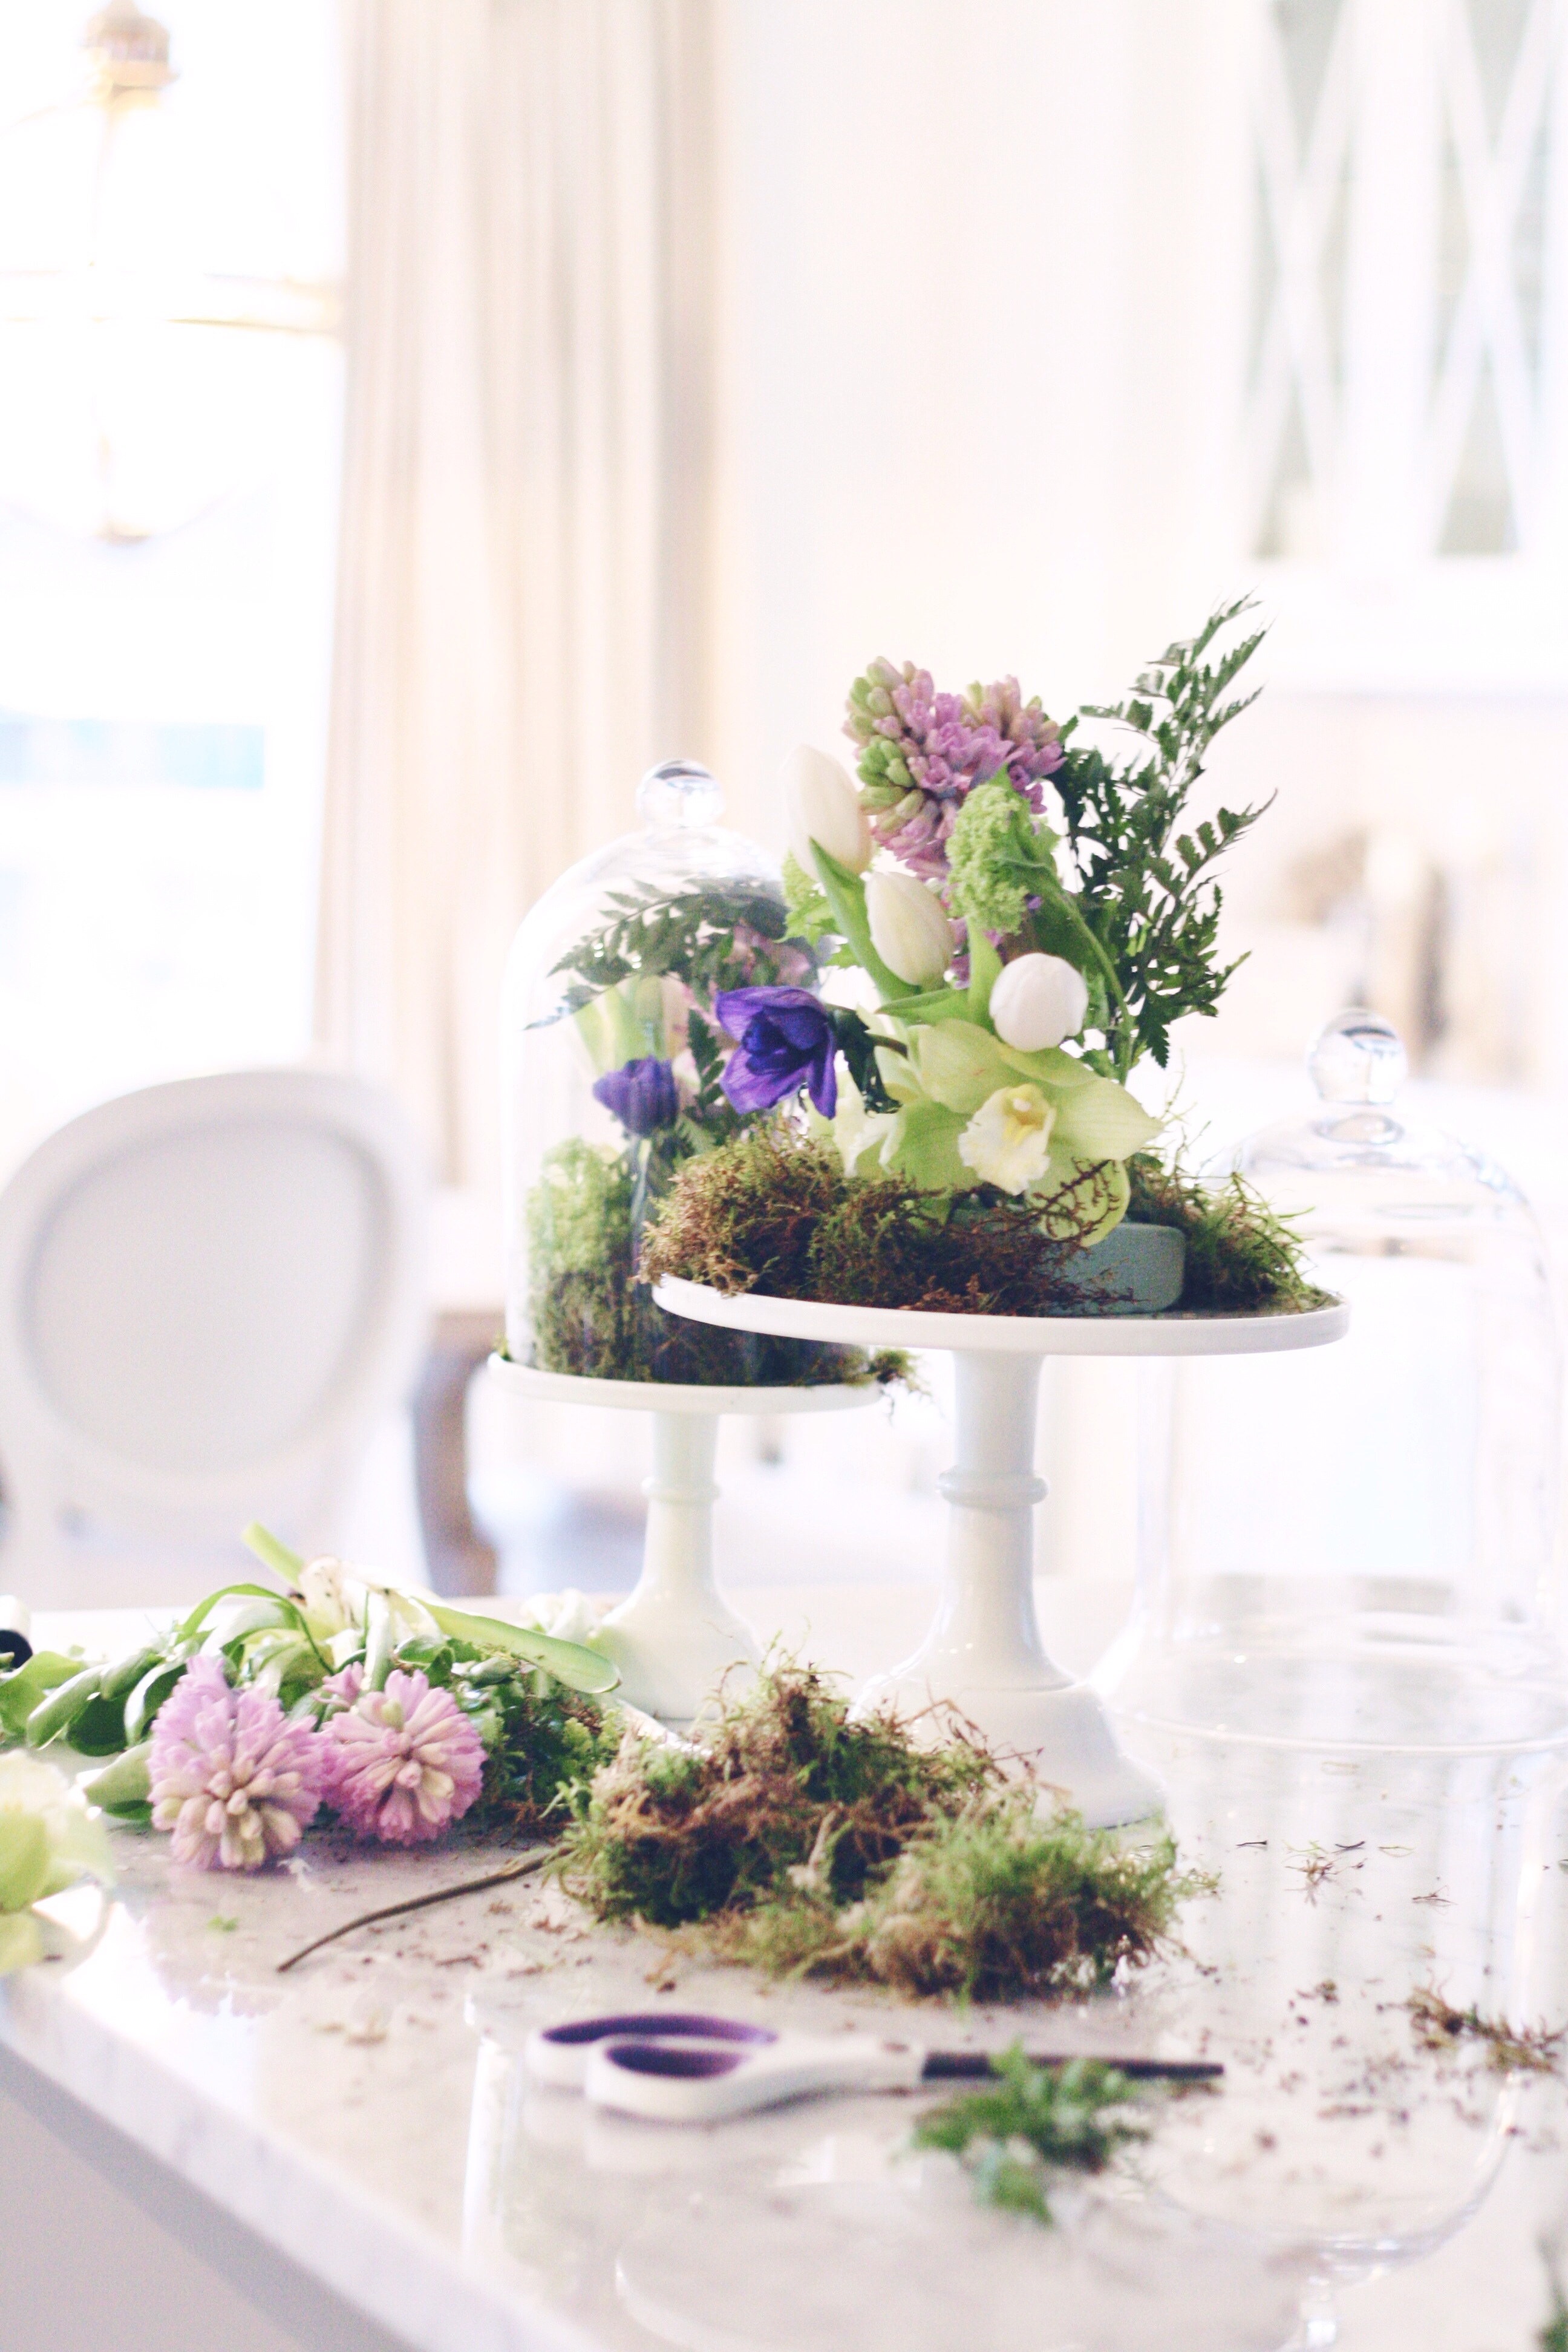
As you can see this whole creation doesn’t look too put together before it goes under the cloche, so don’t worry if yours looks a bit of a frazzled mess- like mine above!
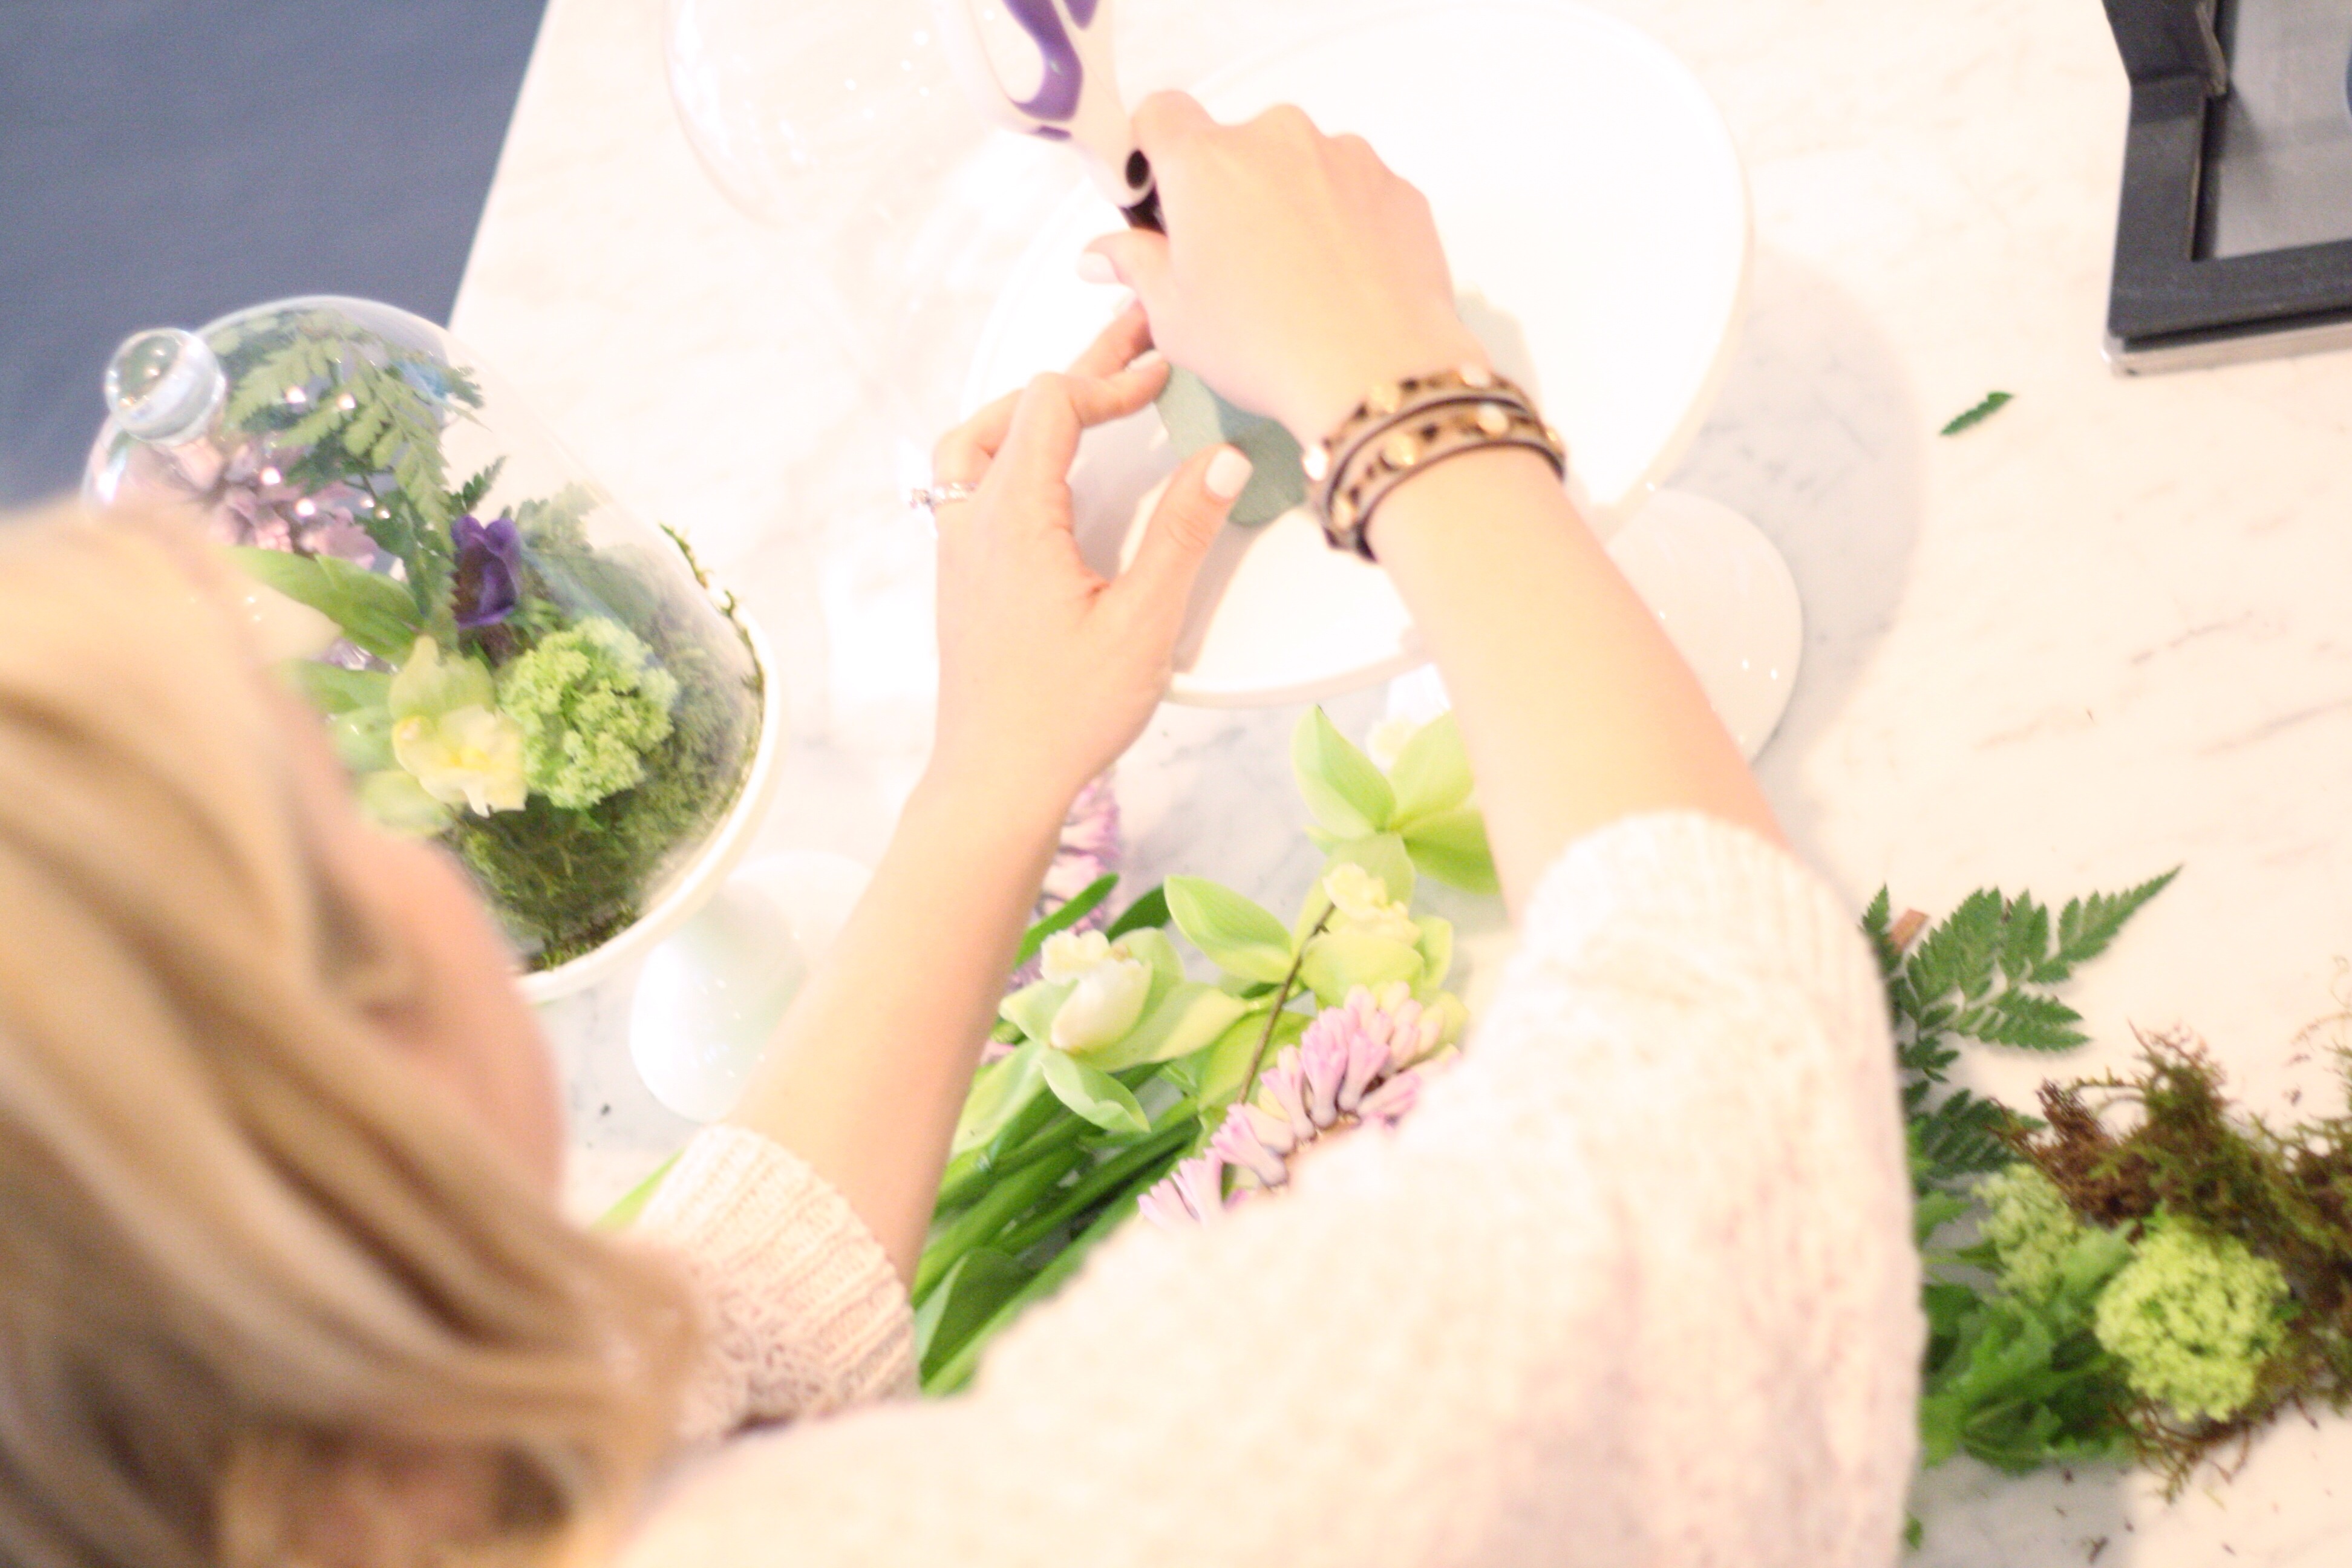
Soak your floral foam brick in water for about 15-30 minutes. (Follow the instructions that come with it) It should be nice and soaked so the flowers can drink from it! Punch random sized holes with your scissors, this is where you’ll be placing the flowers. It’s important that you don’t punch the flower through on it’s own, so the stem doesn’t fill up with foam! You don’t want to plug the poor flower up!
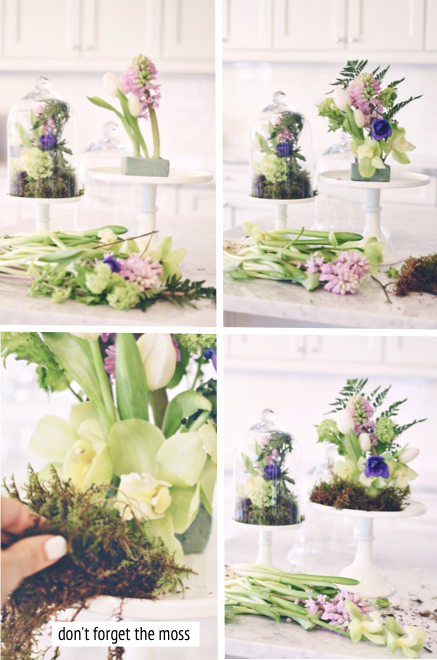
Flower by flower build your arrangement, creating different heights. Once you have it full enough, surround the block and cake stand with fresh moss. Once you’re finished, slowly pour some extra water, soaking the moss. Slightly bend the flowers back with your hand while placing the cloche over your arrangement. And voila you’re done!
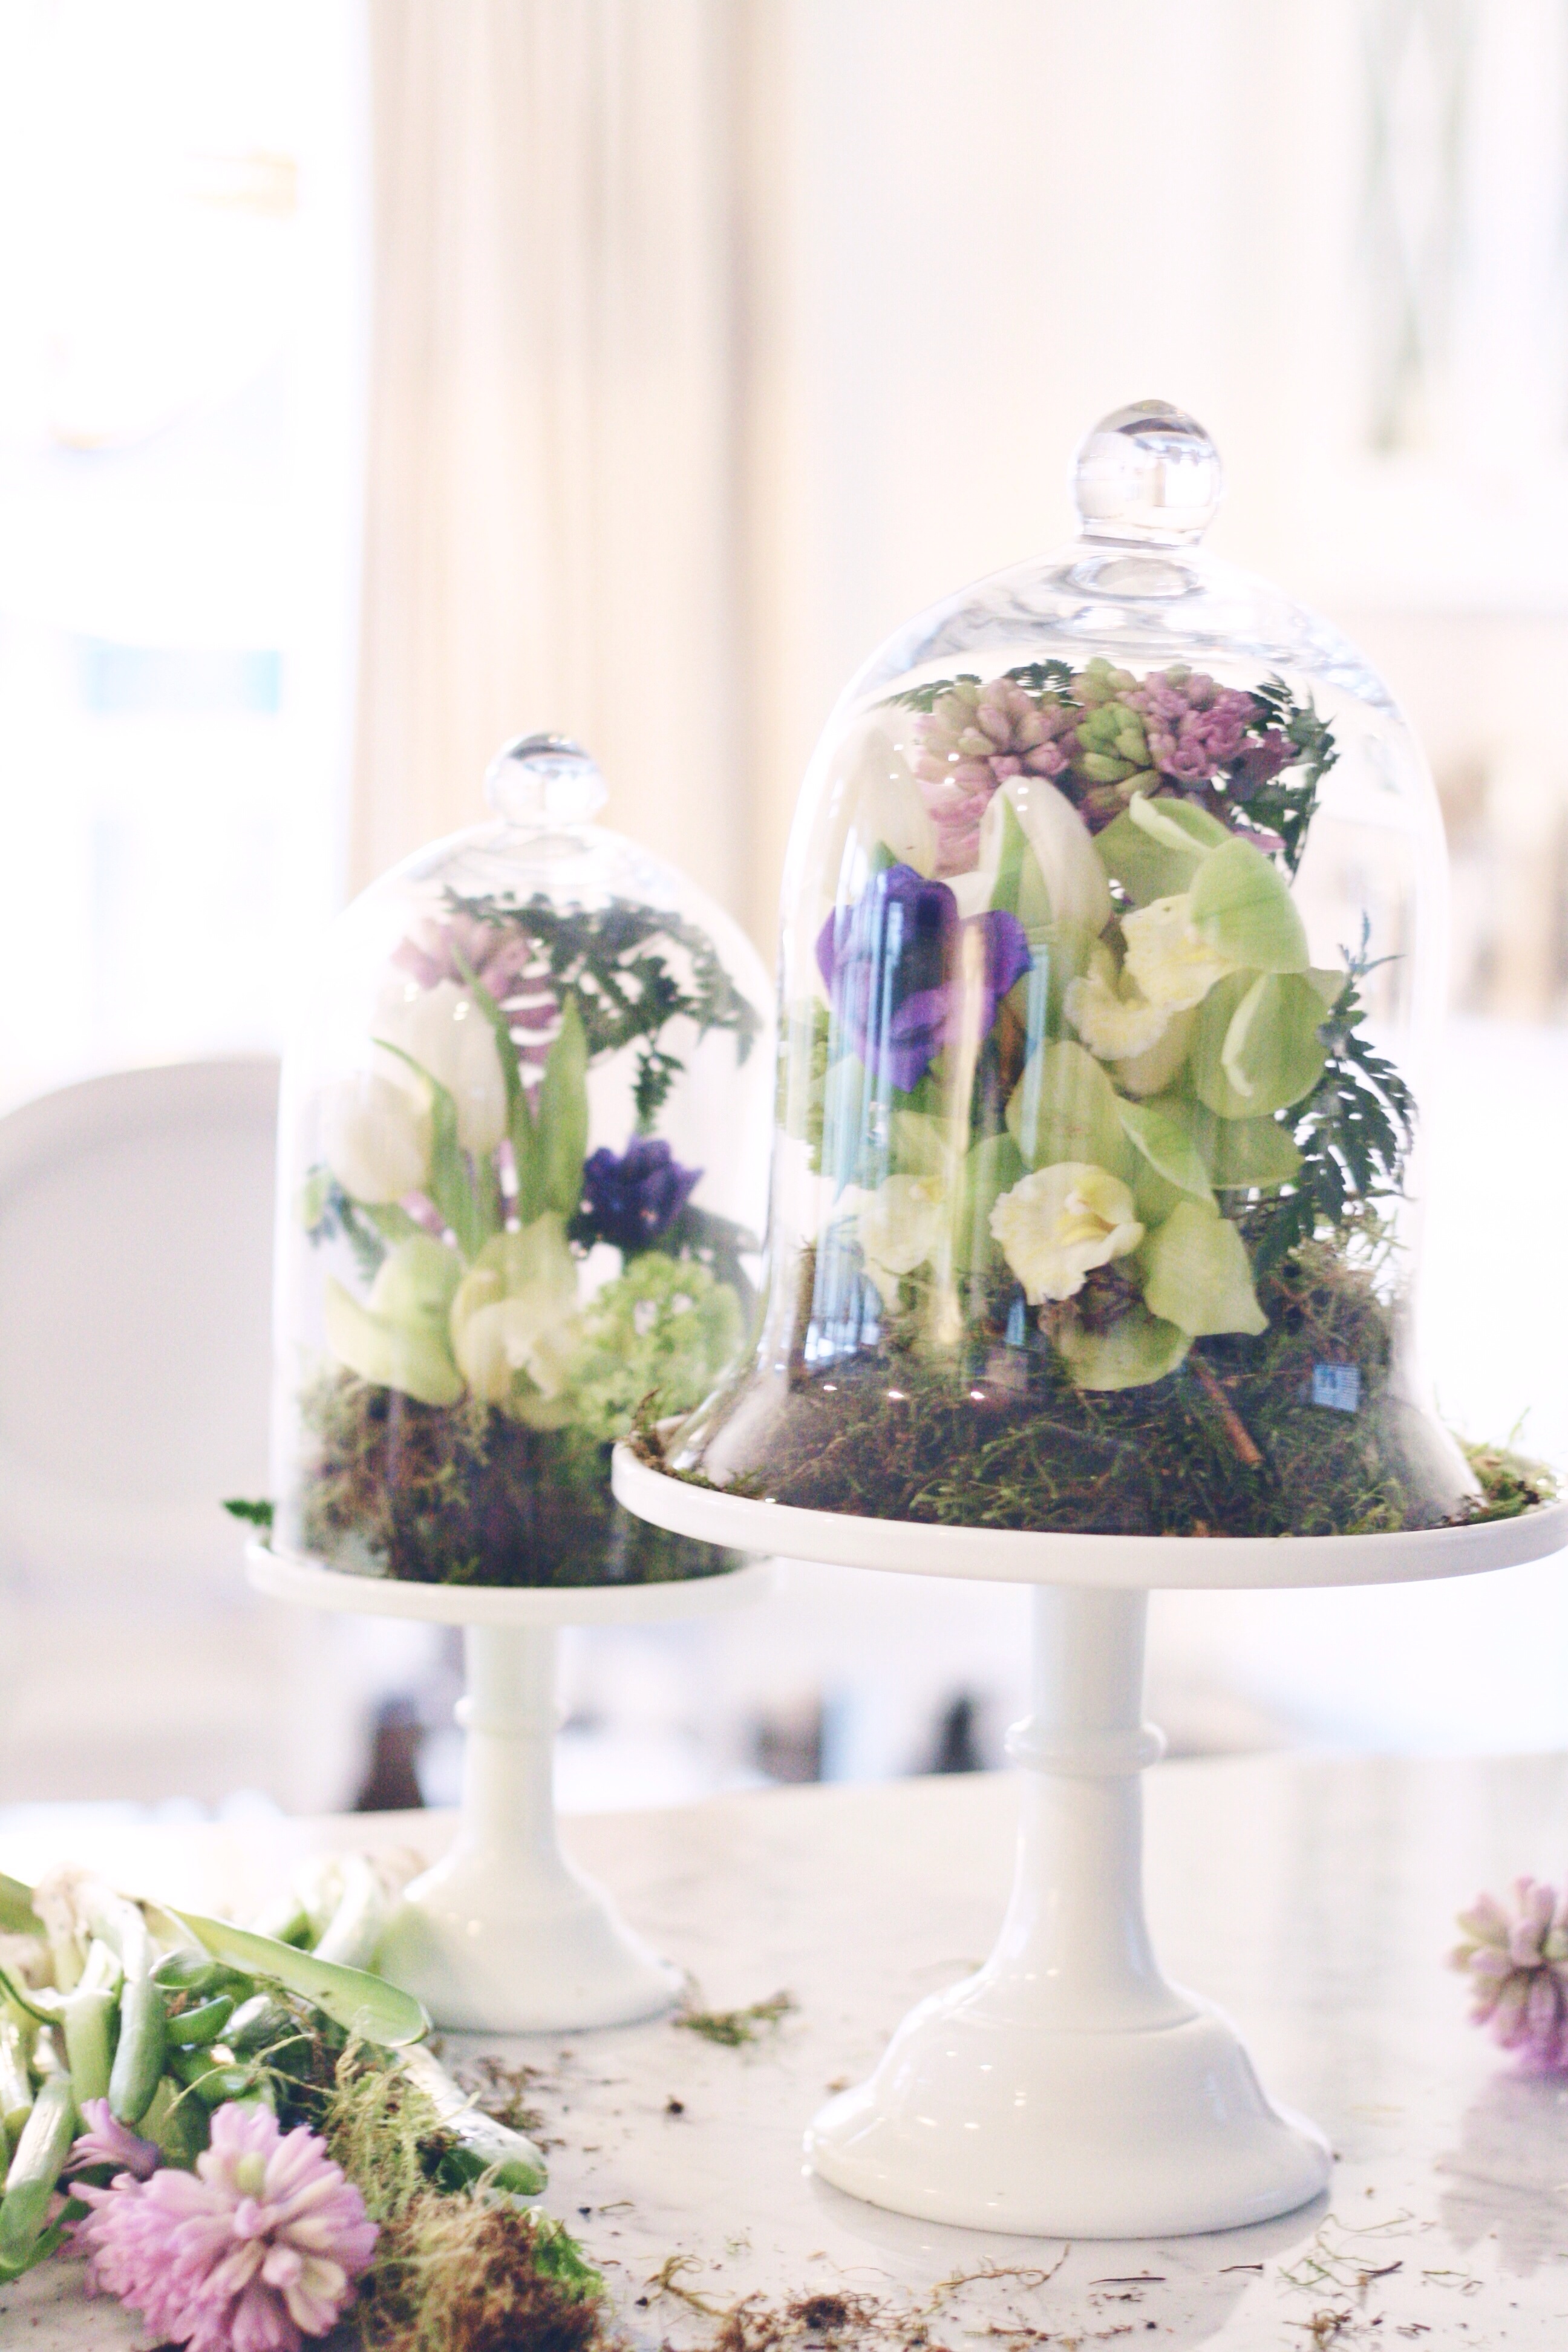
Note: I tilted by cloche up a touch to let air in. You might need to wipe down the inside of the cloche every morning since it will get some water vapour trapped inside.


This is a great take on a table centerpiece. I’ve never seen one done this way before but it certainly is beautiful.
Whoa, these are so so so beautiful! Now, to find a cloche…
~ ashleigh
http://www.joliejouel.com
So gorgeous!!! Thanks for your inspiration and creativity!
Beautiful flowers:)
New on http://www.shallwesasa.com
This is so beautiful! And so simple- I will totally try this out 🙂
That look amazing! Great idea for spring!! x
This is so beautiful, thank you for the diy!
xo,
May
http://dancelikenobodyswatching.me
Beautiful! I am so inspired to try this.
Everything mom & baby,
It will be beautiful!!