Floral Sun Hat
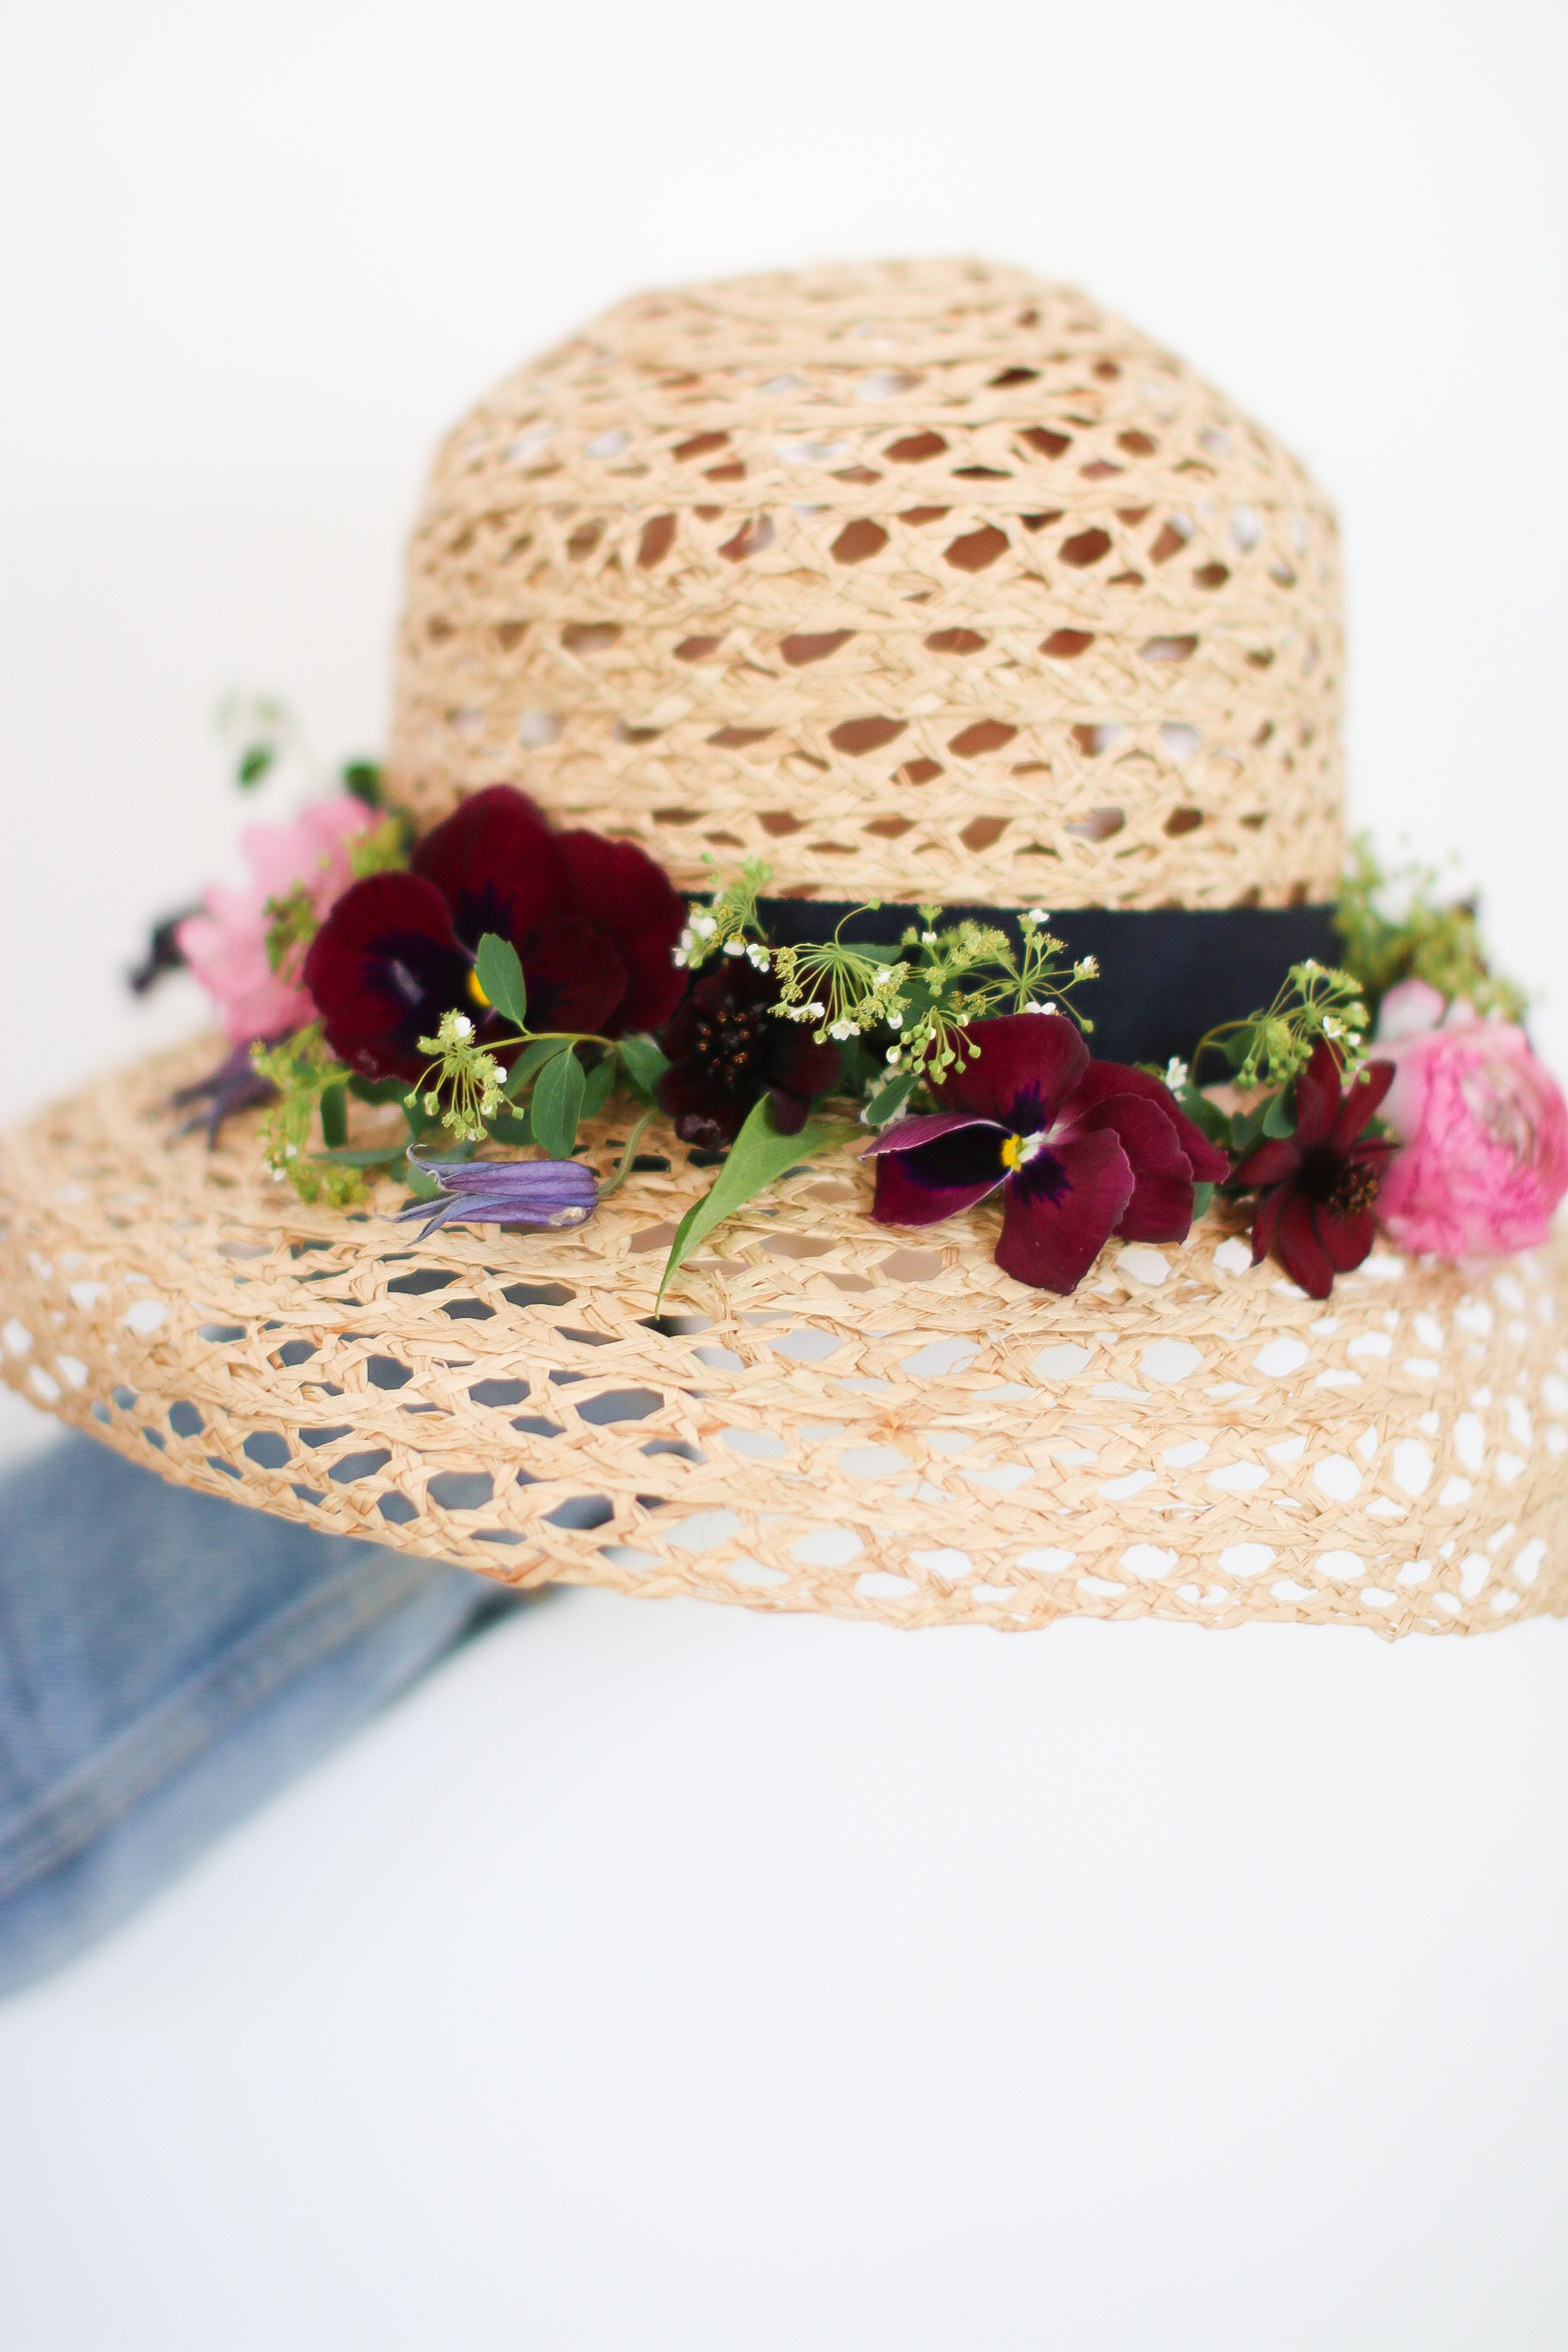
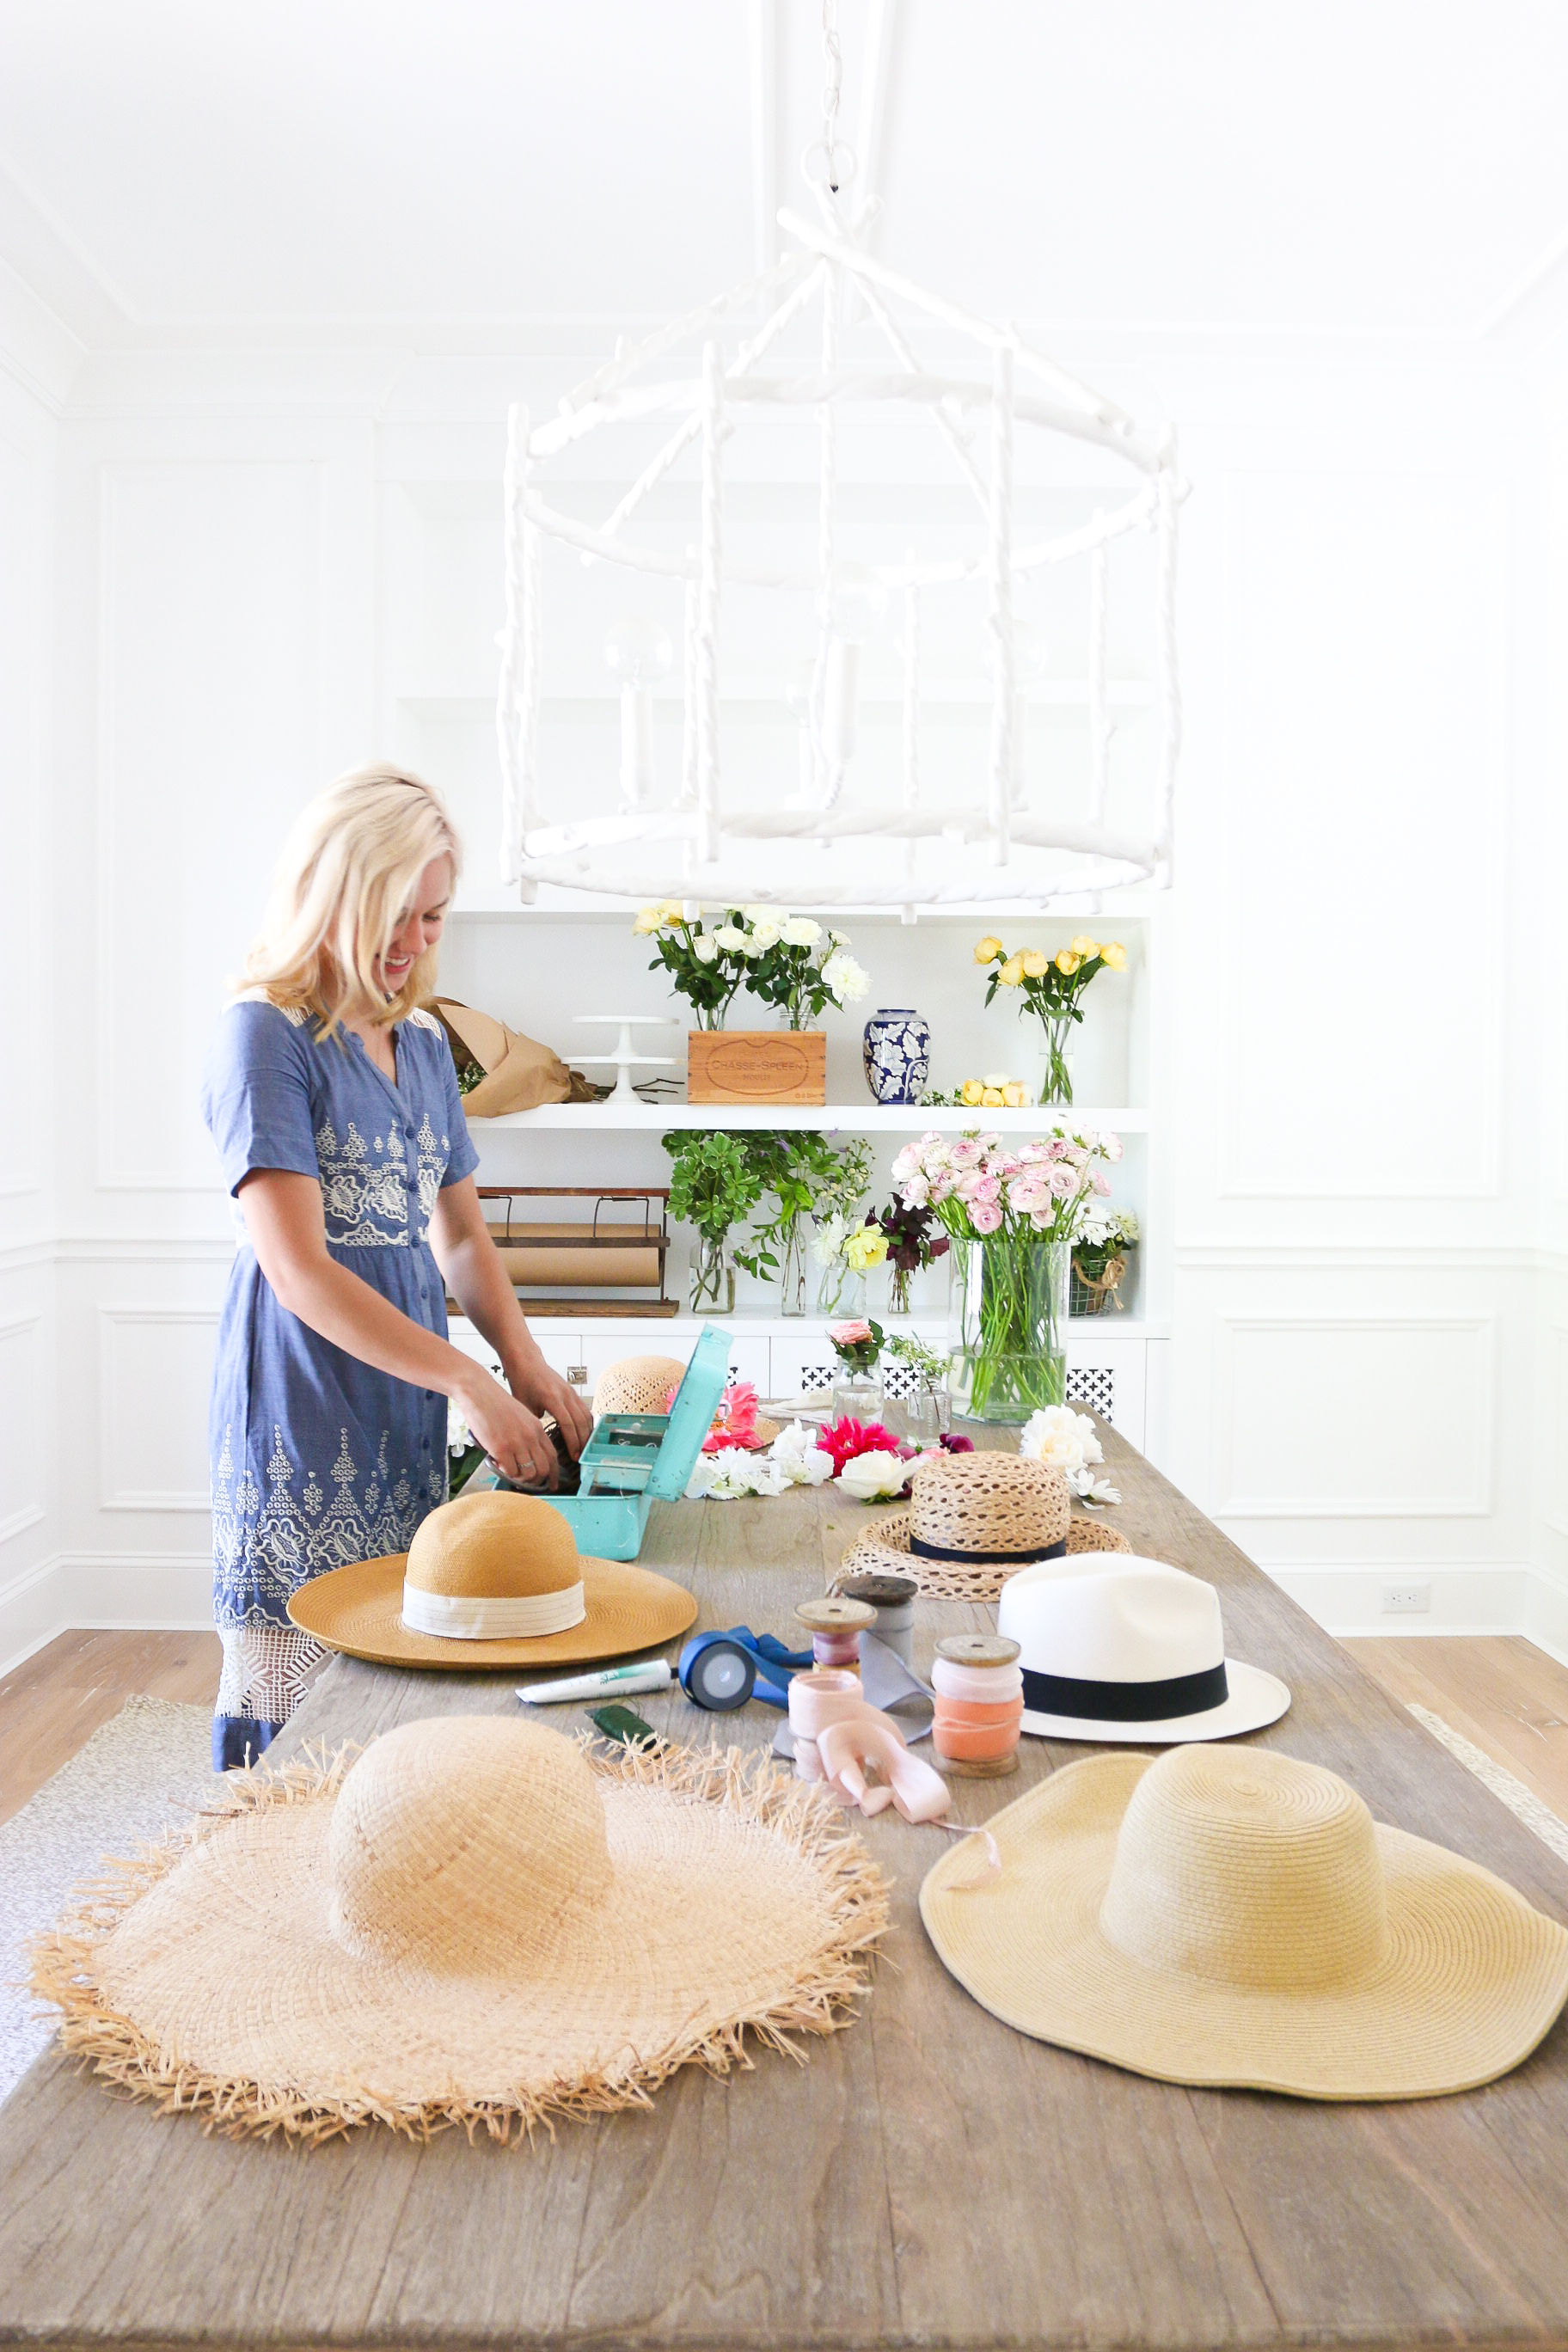

With only a few more day’s left till Mother’s day I have a really fun (and quick & easy) DIY perfect for your amazing momma! If you know me, then you know that I love a great sun hat and my obsession over flowers! I love the classic floral crown, so incorporating it into a sun hat sounded even better! Today I have the lovely Alice from Floralisa (my favourite florist in Fort Langley) showing you all her step by step instructions to make your very own floral sun hat! Now, if you’ve ever attempted to make a floral crown- wiring each bloom with wire and tape, then you’ll know that it’s not as easy as it sounds! Alice has a secret step that’s not only easy but so quick, with a little help of some floral glue/adhesive! You’ll find all the steps below!
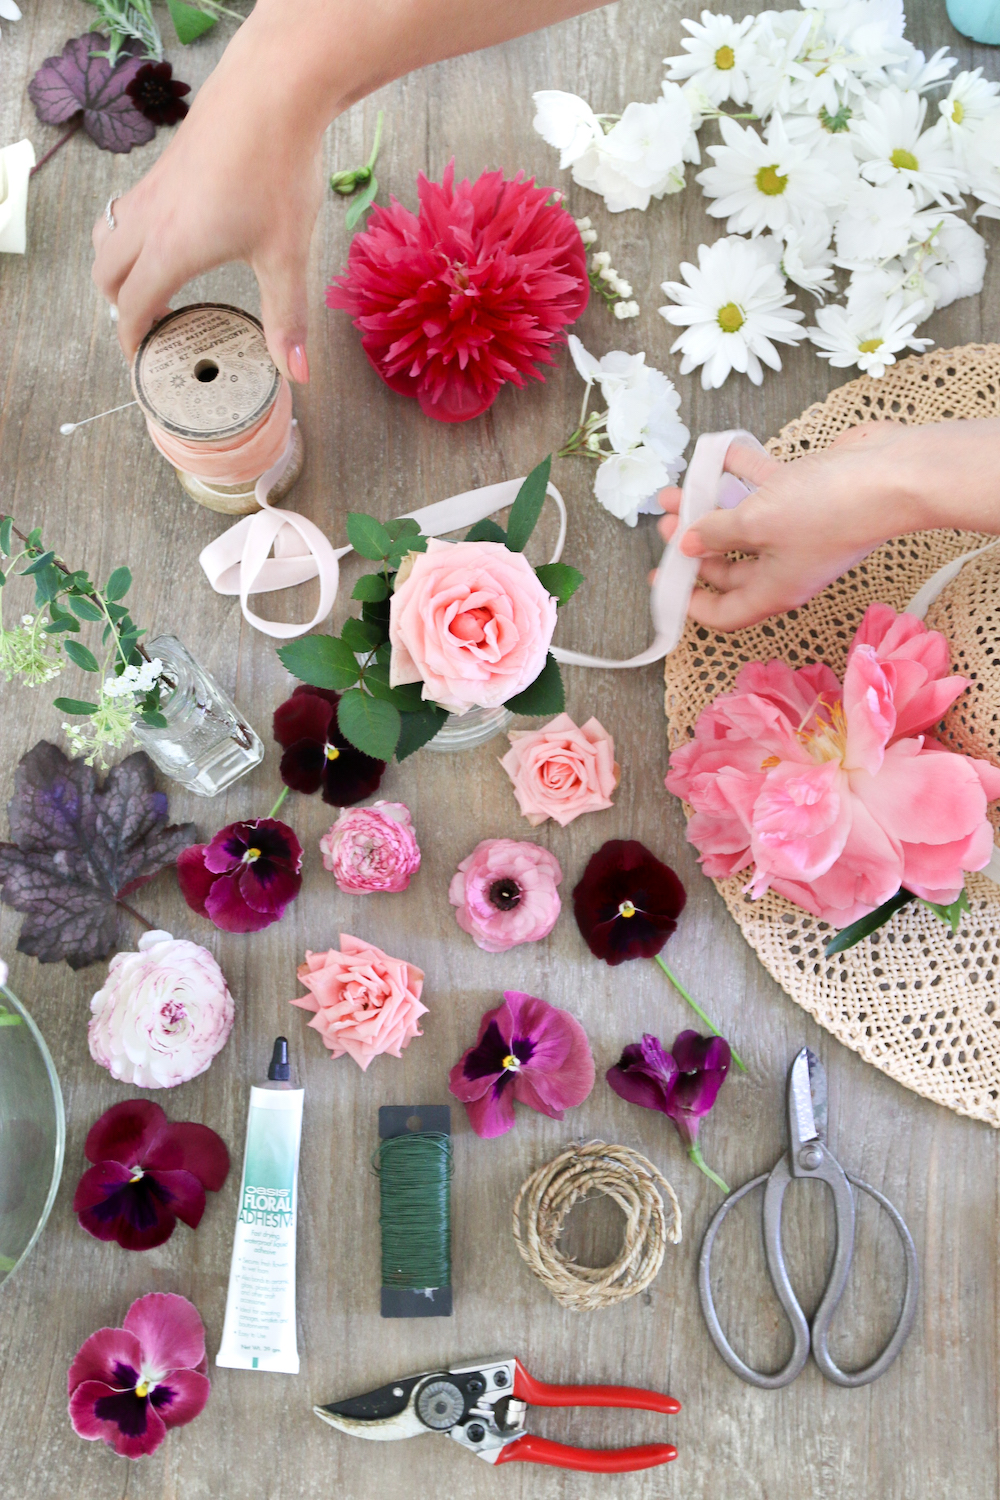
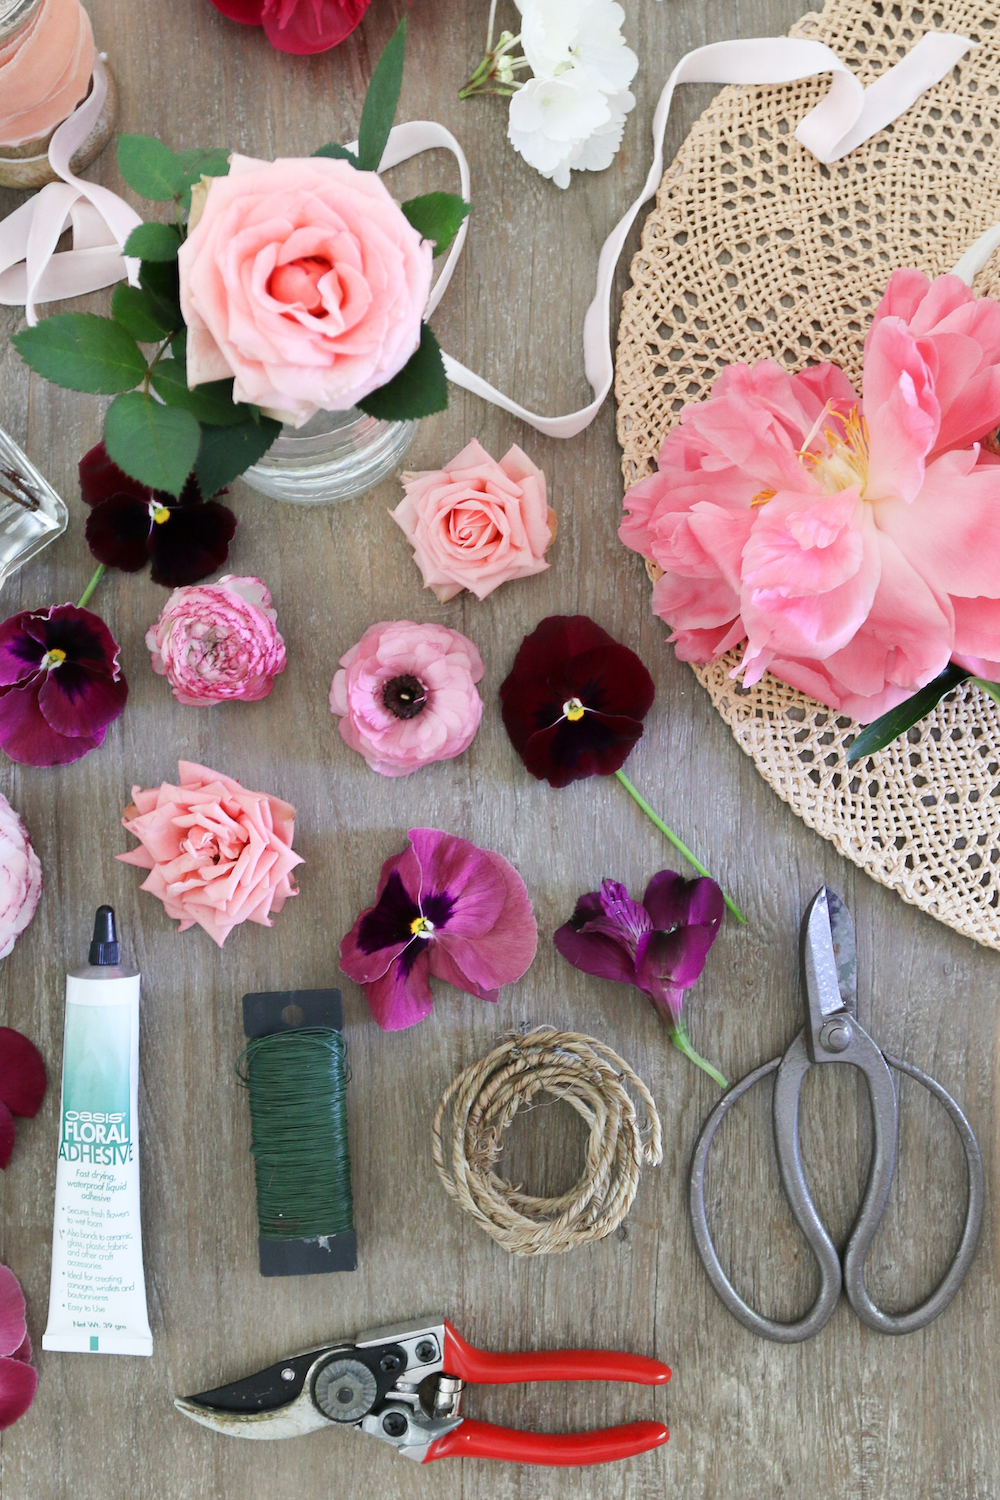
Materials
Floral adhesive
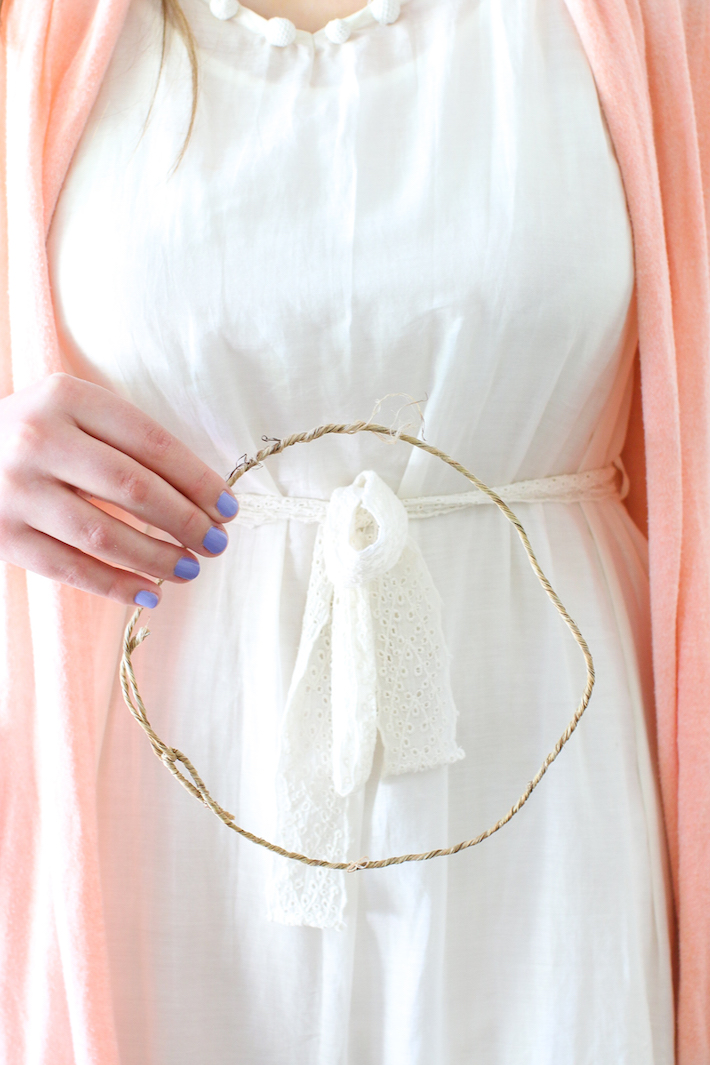
Twined wire
Thin gage wire
Wire cutters
Florist clippers
Assorted foliage (waxy leaves hold up best)
Assortment of focal blooms, complimentary medium size flowers, filler flowers, and little textures to fill in the gaps.
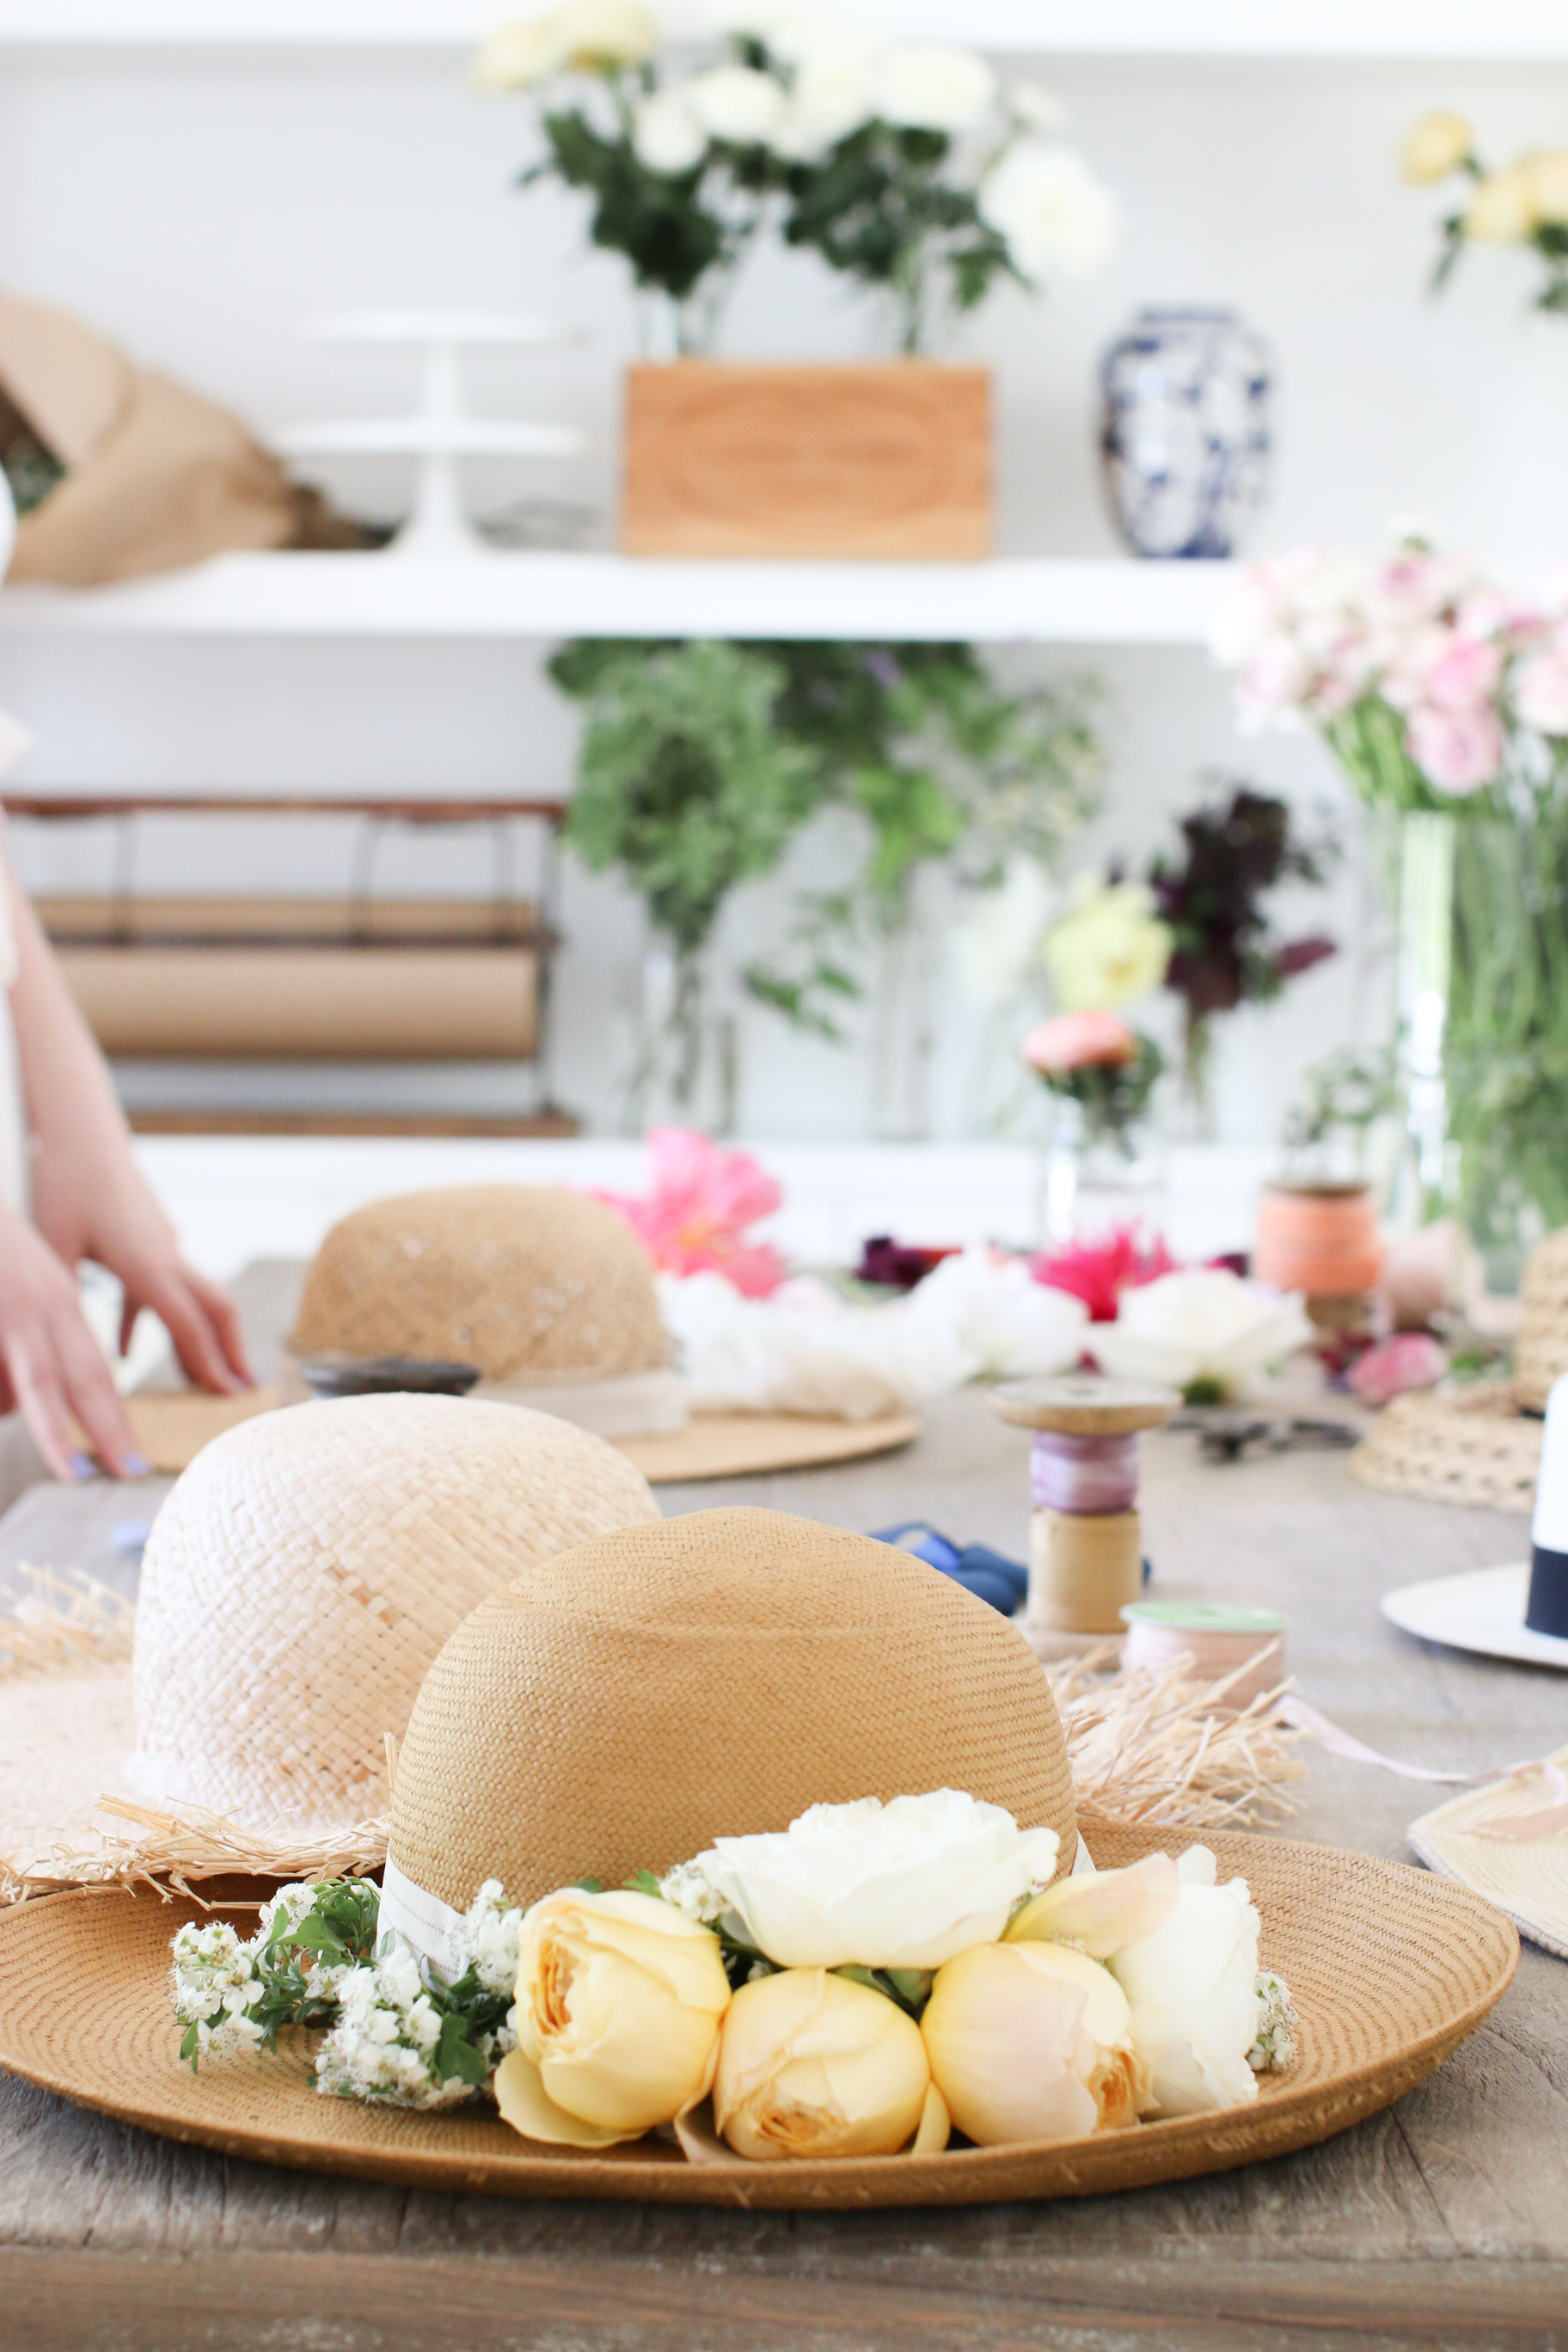
1. Find a cute sun hat, and pick up supplies from your local florist. If you have flowers growing in your garden you can use those too! (We love garden grown flowers!)
2. Measure around the base of the hat with your twined wire to the correct length. (Cut a little extra off just in case)
3. Open the length of the twined wire and work from one end to the other so it’s easier to handle.
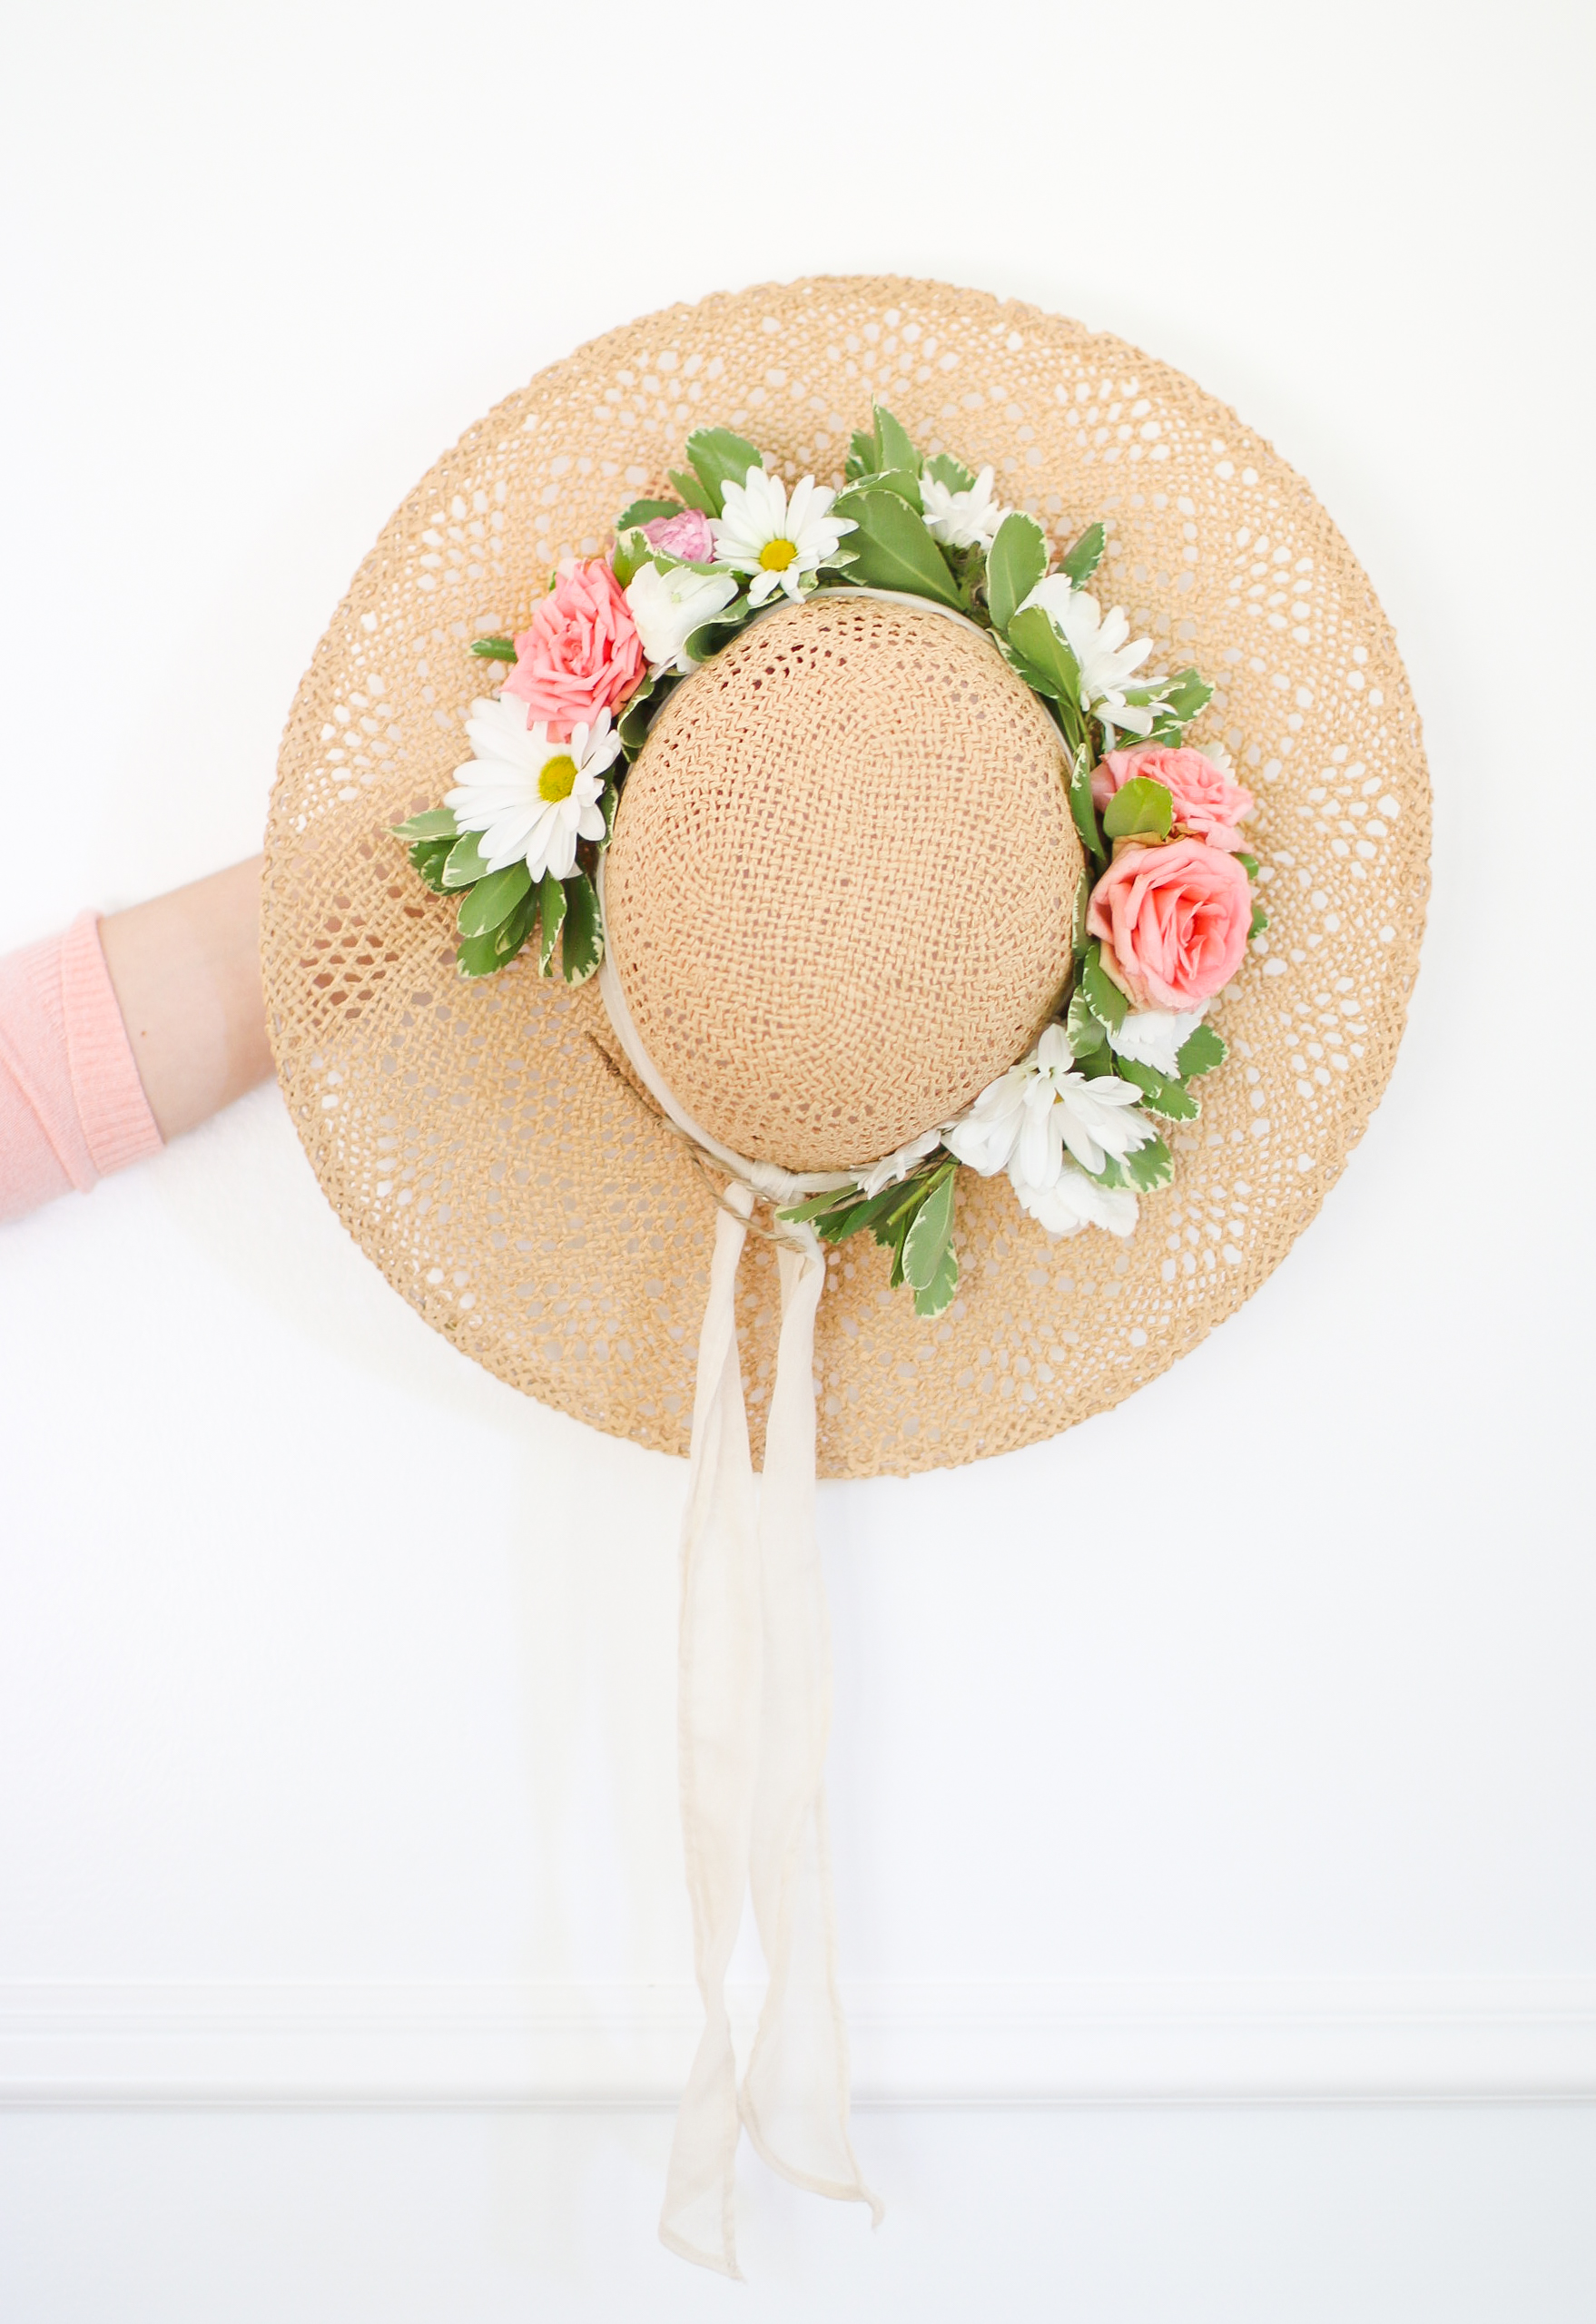
4. Using a thin gage wire- place foliage along the twined wire base and tightly wrap the thin gage wire around the stems of the leaves, working downward to the other end. Add in different leaves and greenery for different textures and details!
5. When you’ve almost reached the end of the twined wire, switch the leaves in the opposite direction giving it a nice finished end, matching the other side! By the end of this step you should have a beautiful base of greens to add your flowers into!
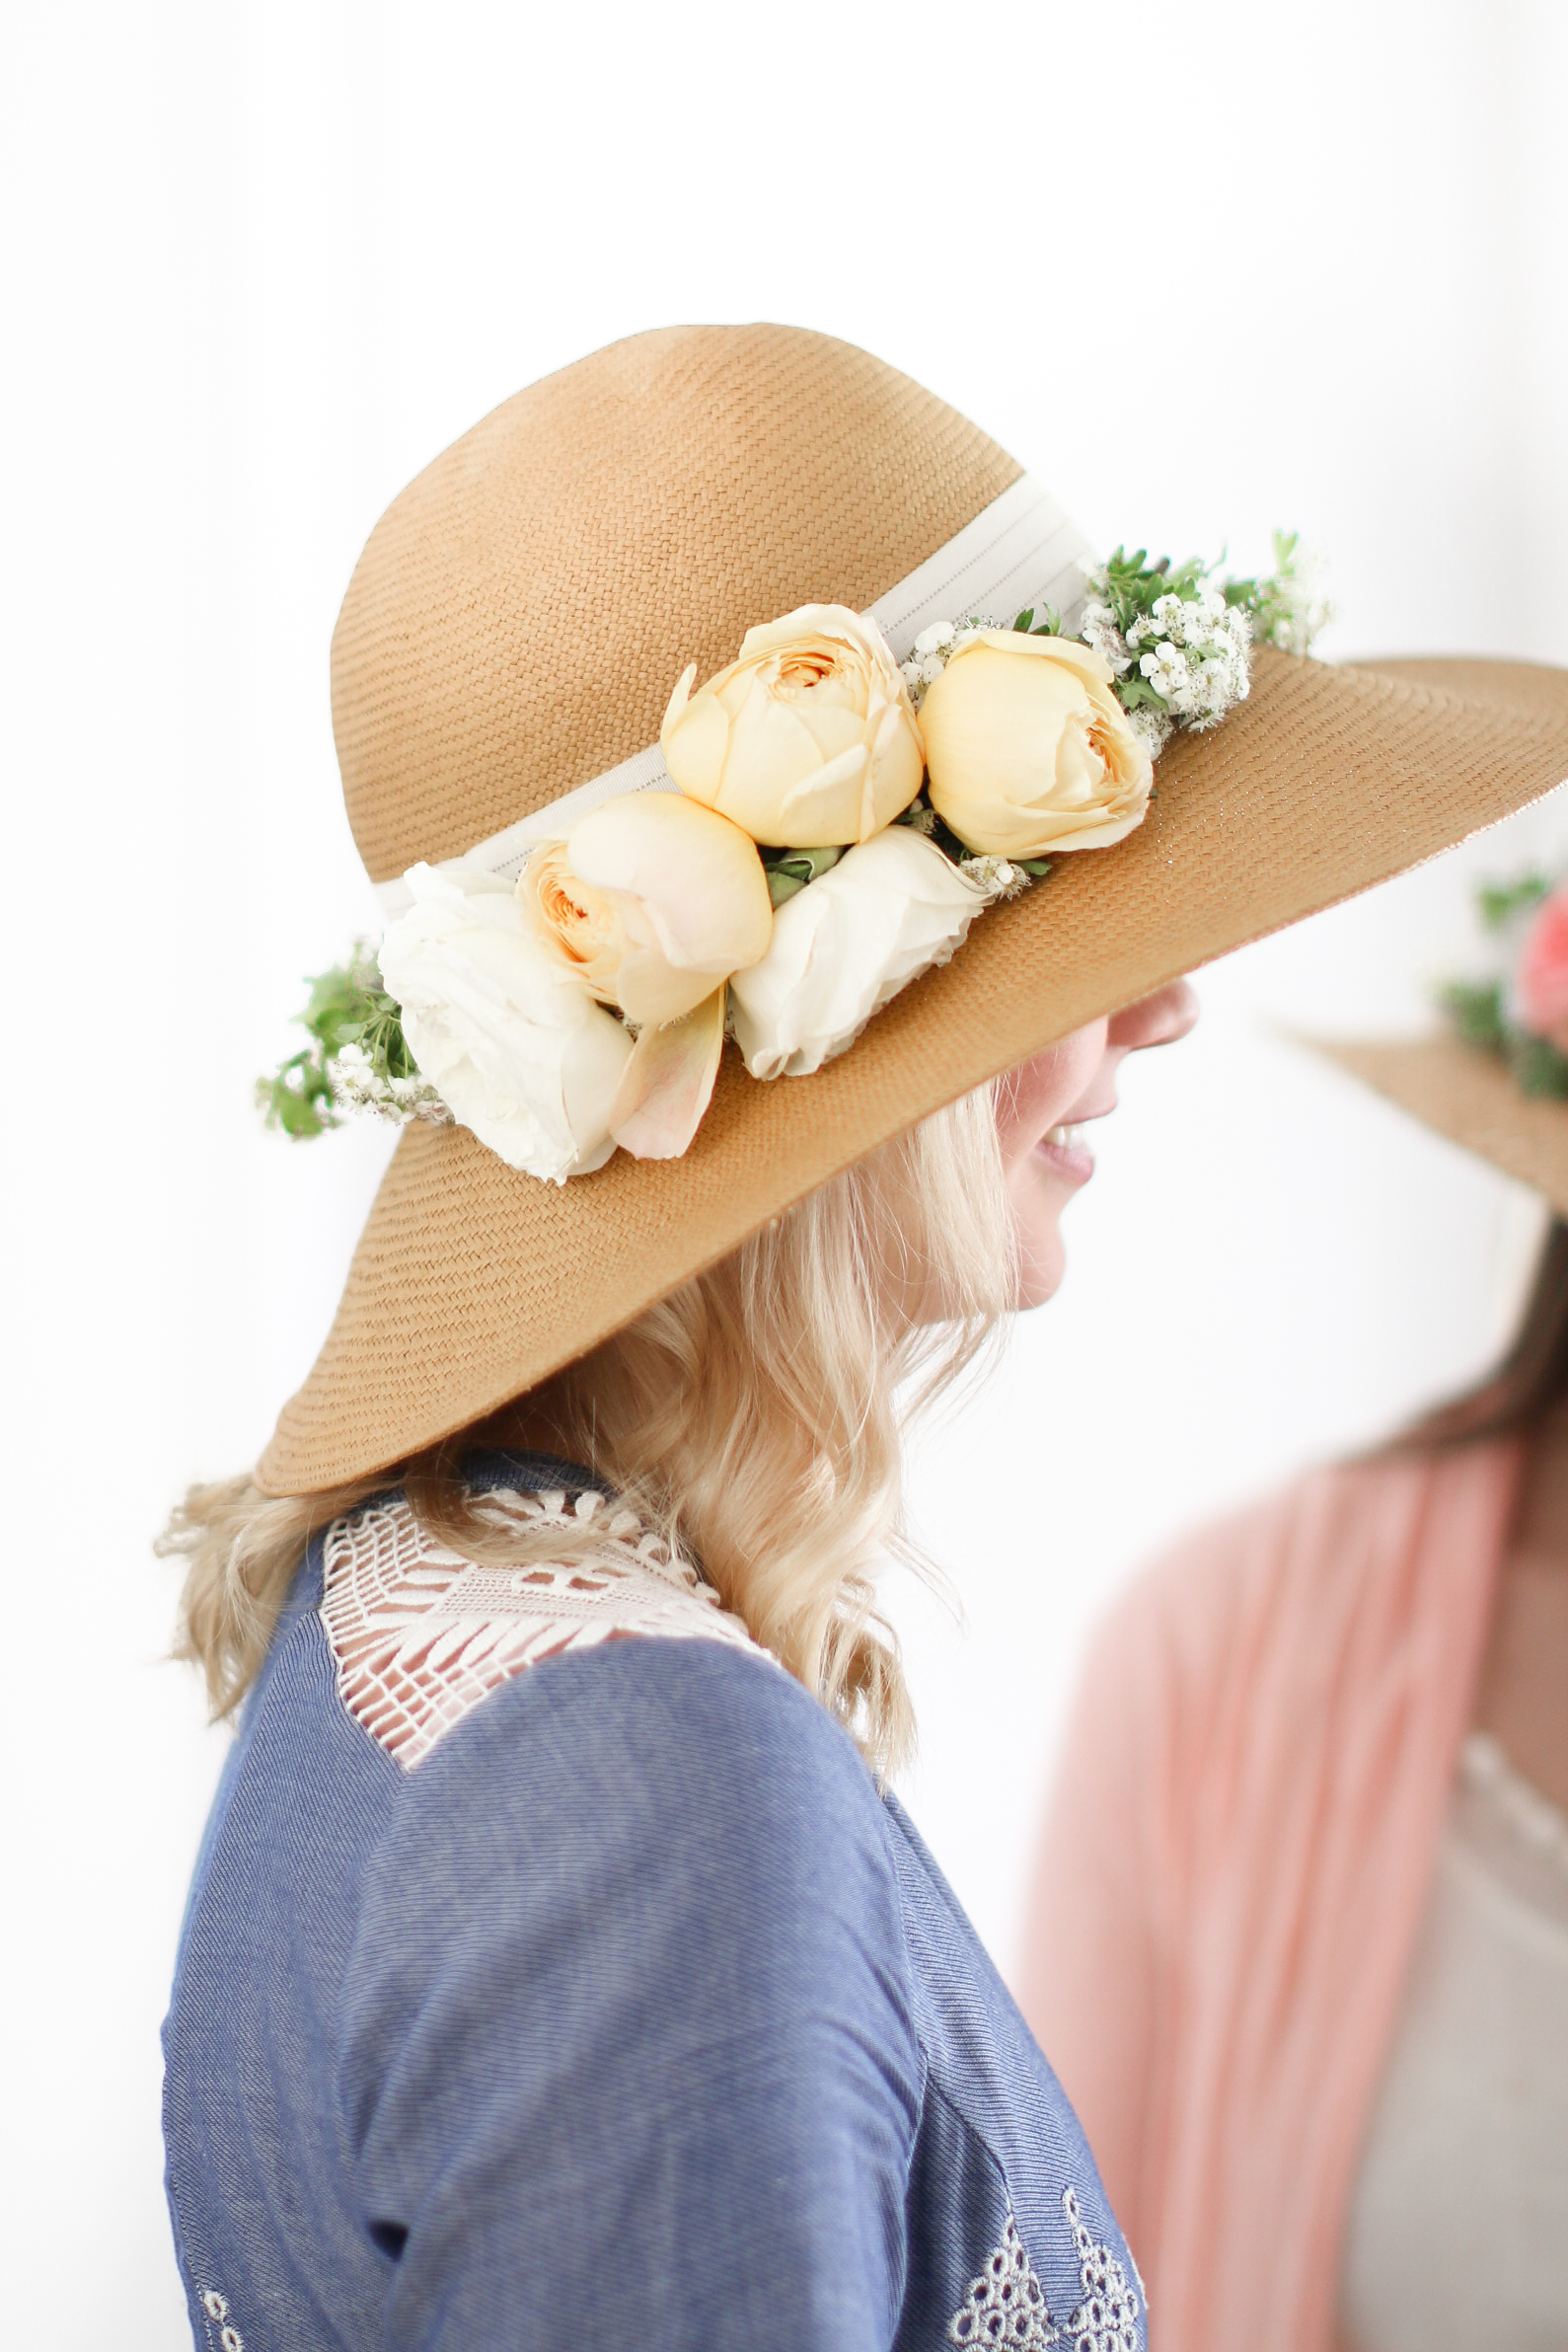
6. Now the fun part! Adding the flowers. Chose a variety of blooms in a pretty colour palette. I like using monochromatic colour tones.
Also when choosing blooms try and work with a variety of sizes. Choose a couple big focal blooms, a few types of medium size simpler blooms, and small delicate filler flowers or textures.
If you want to do a delicate even band of blooms all the way around, you’ll want to work with more medium to small size blooms. If you want a large side cluster (my favourite) you will want 2-3 larger blooms for the side and then a couple medium size flower heads to transition out to a thin band of of small textures across the front and other side.
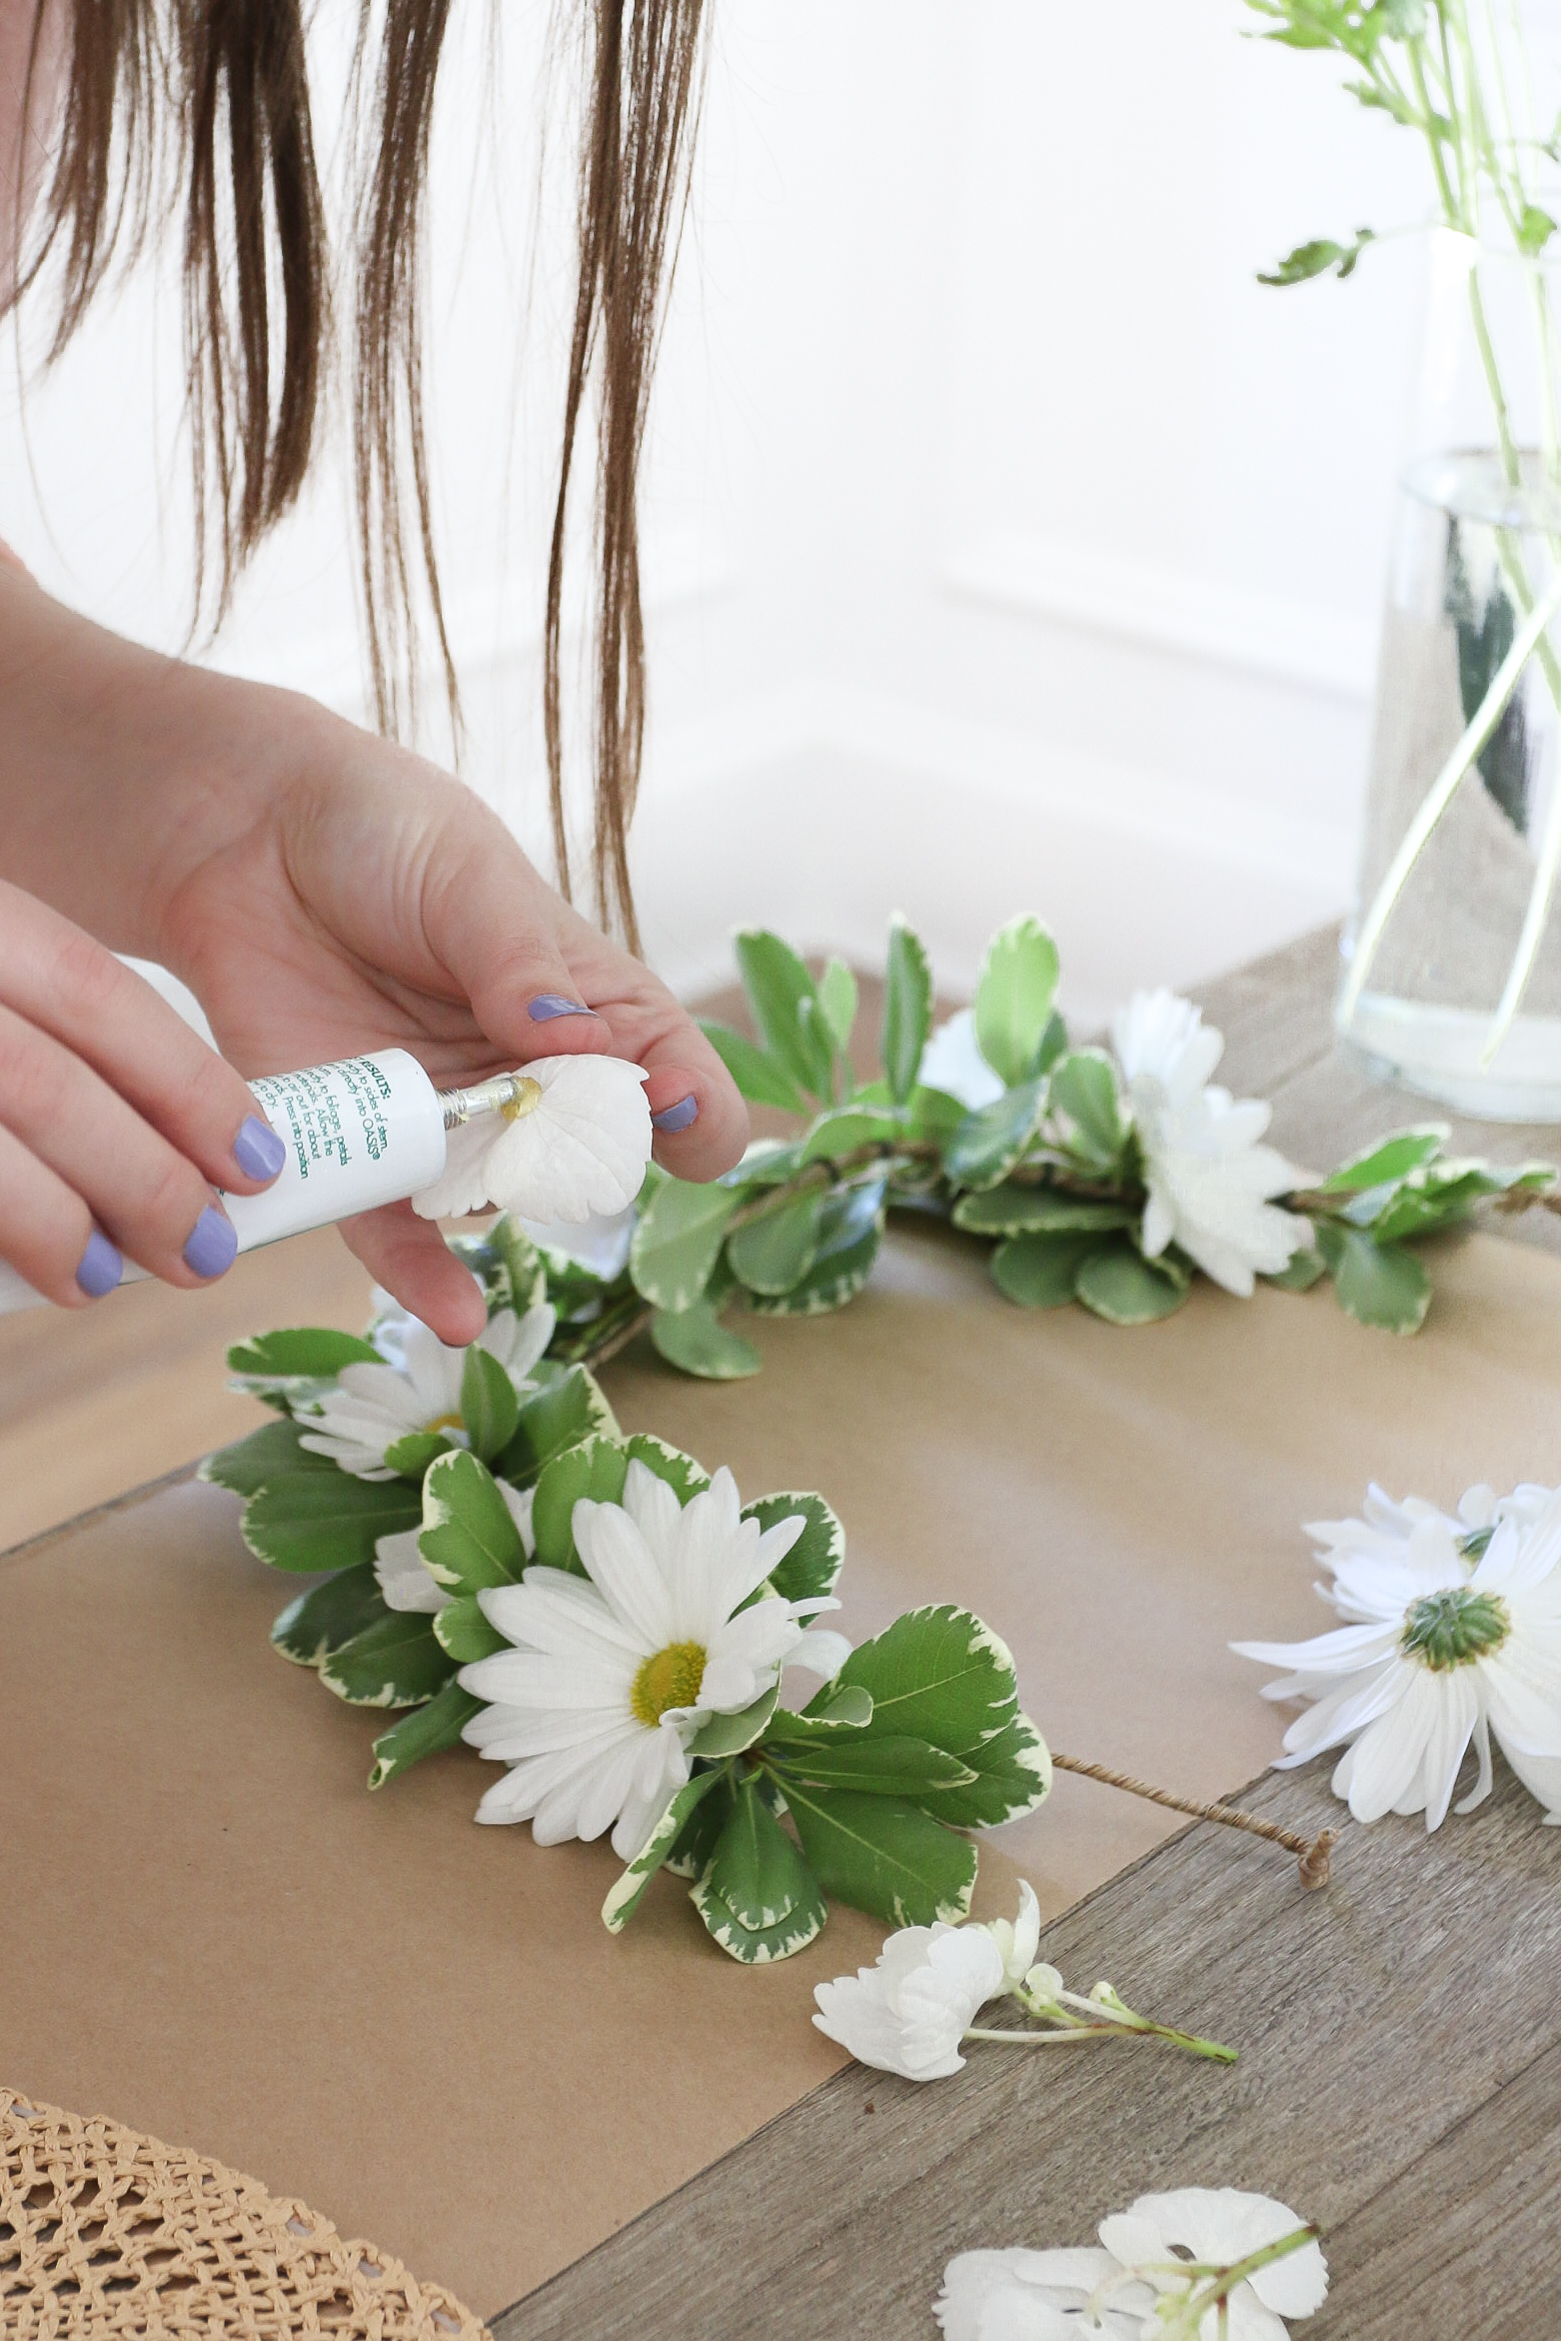
7. Snip your flowers into short workable lengths. Usually just need about an inch of stem length.
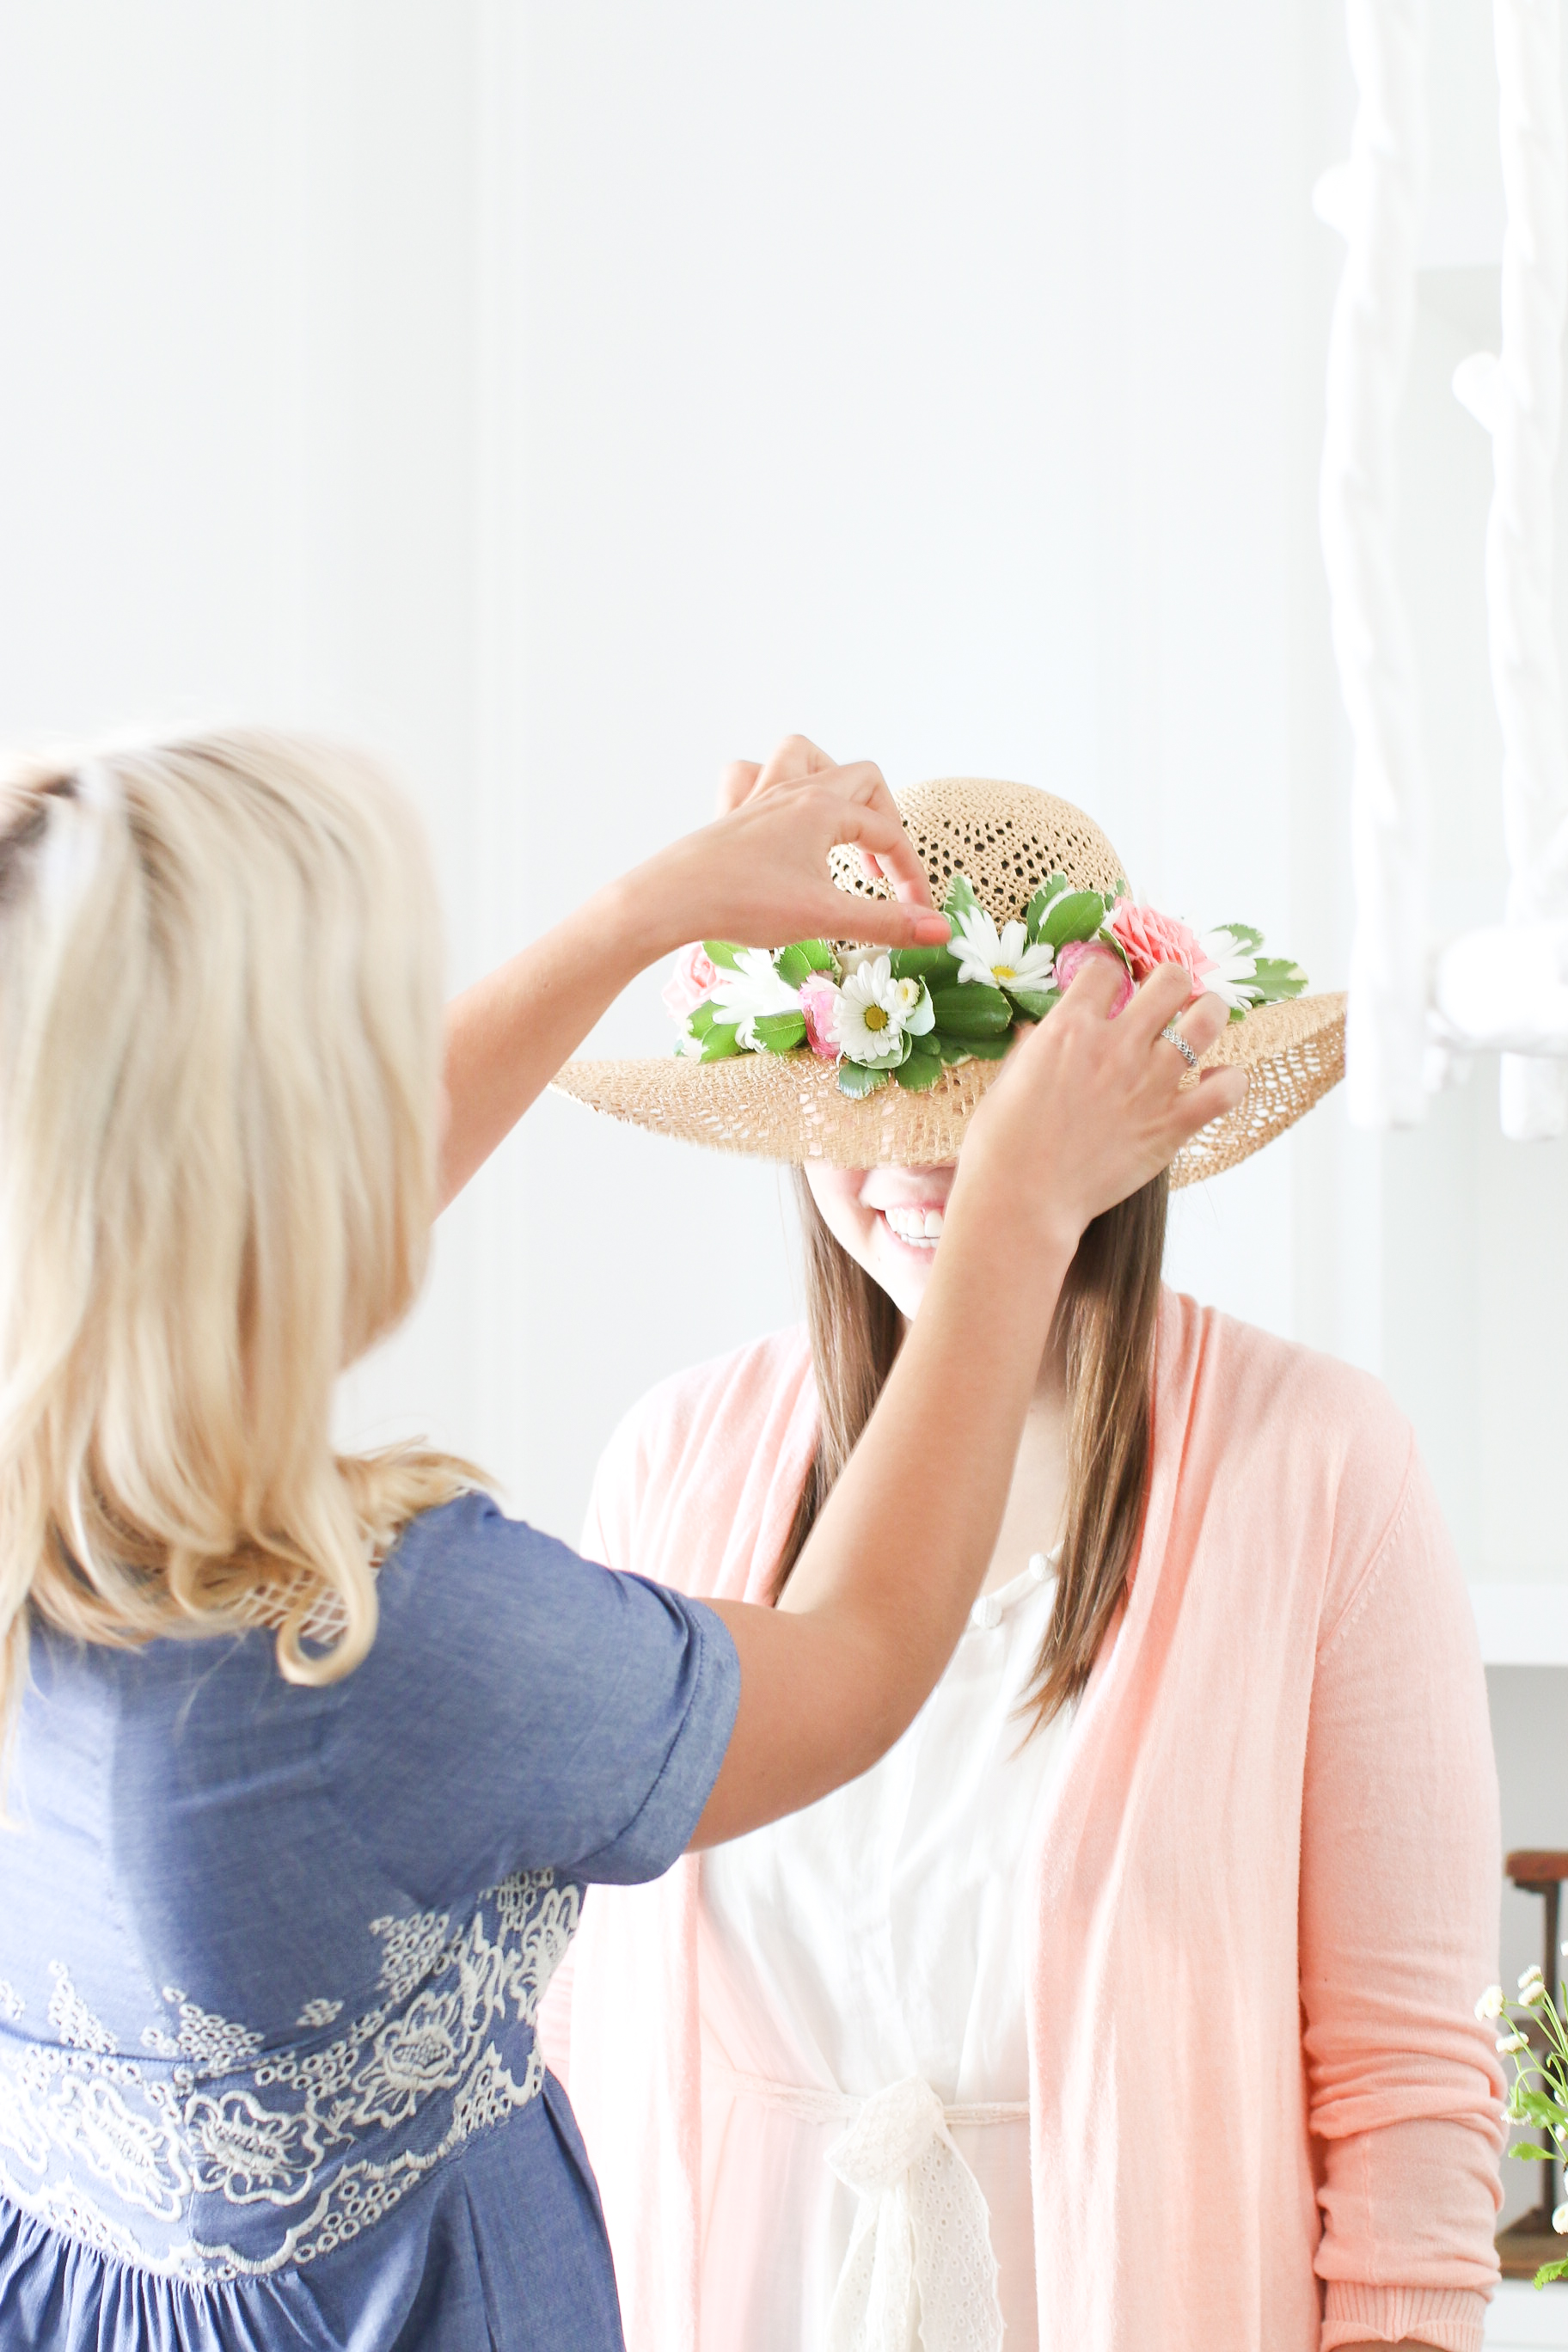
Add a few dabs of floral adhesive onto the stem, wait a second to let it go tacky and nestle it into your band of foliage. Hold it there until the glue sets. Continue with the rest of your flowers alternating and filling in the gaps with little details.
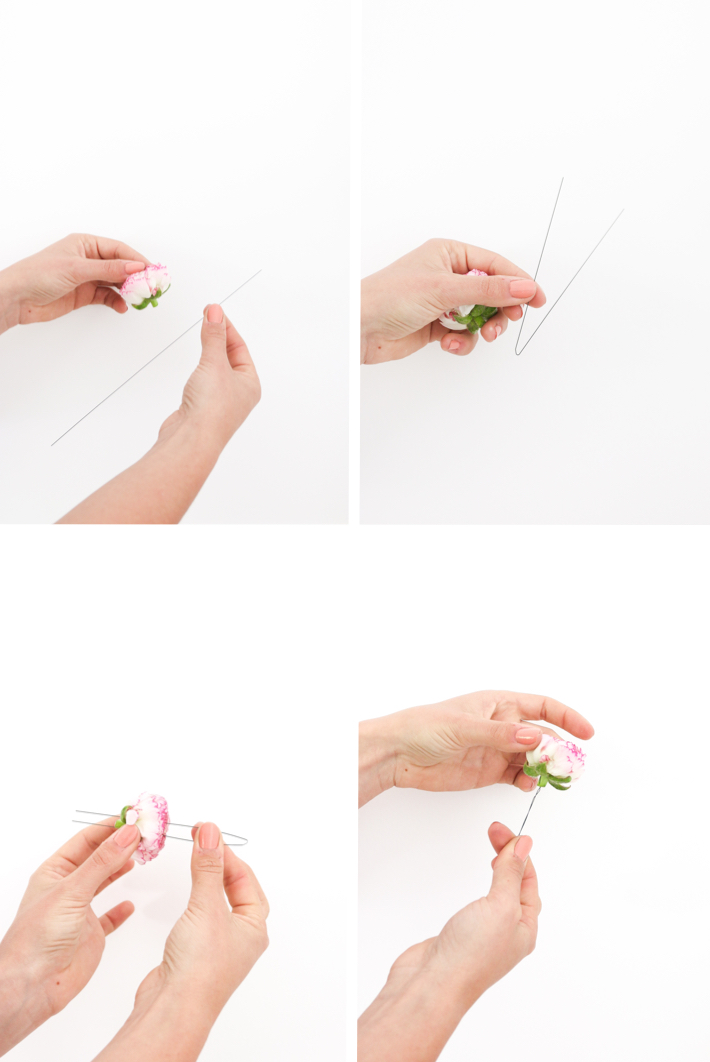
10. For heavier focal blooms like garden roses, ranunculus or peonies you will need to give it a little extra wire support…with a piece of thin gage (about 5-6 inches long) wire fold it in half into a bobby pin shape and carefully pierce it through the flower with the ends coming out where the stem is. With those long wire ends, wrap the big bloom around the greenery base tightly, and finish it off with a ‘twist-tie’ motion. Cut off any wire end bits with your wire cutters.
11. As you go- try it on with the hat to see how you like it! When your done wrap the base around the hat, and pick your favourite side for the front.
12. Optional: cut long lengths of ribbon and tie to the back of the hat for a cute summery feel!
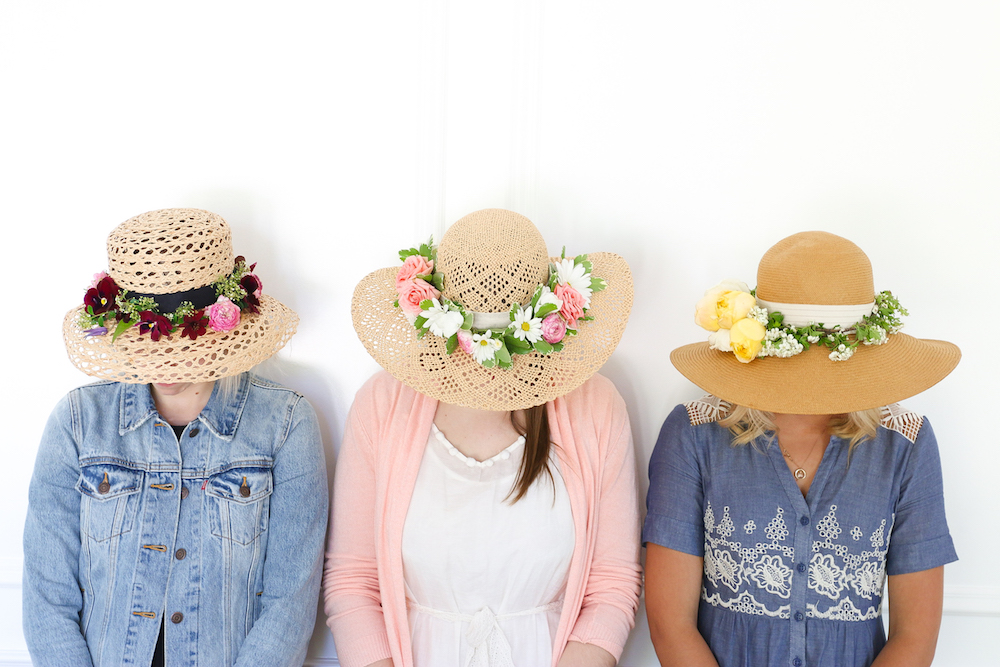
-MY FAVOURITE SUN HATS-


Beautiful, all three of them. struggle of wiring each bloom, been there done than. I tried to make flower crown with roses once, didn’t happen. This step by step method looks feasible and beautifully presented. 🙂